
How to configure a multilanguage site in Joomla? Part 2.
In this article I'll show you how to make content for multi-language site. It’s second part of our tutorial, so if you are just starting your adventure with creation of a website, that provides support for multiple languages, I suggest you to read this article:
TIP: Multilanguage Joomla 3 site - learn how to do it in 5 simple steps.
As an example, I will create content for the Polish language, but in the same way you can create content for any other language.
Step 1 - Menu Configuration
As a reminder our page now looks like that:
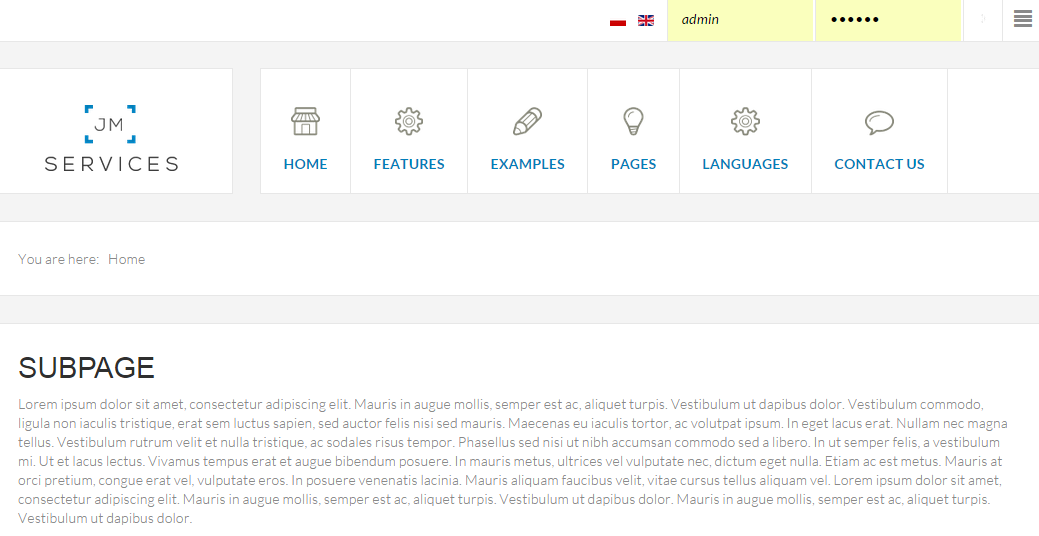
We have a language switcher, but as you can see the entire content of the page is still in the default language. In the previous tutorial in the 5th step we created a menu for each of the installed languages. In this step, you need to duplicate/create a menu module for each of these languages.
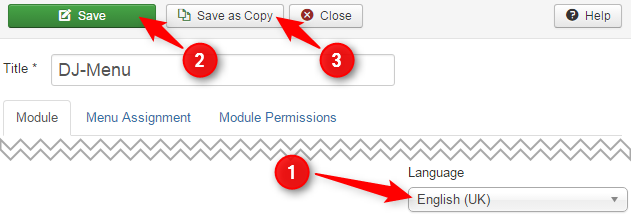
Go to Extensions -> Modules -> DJ-Menu and set Language as your default language, in our case: English. Click Save and then Save as Copy.
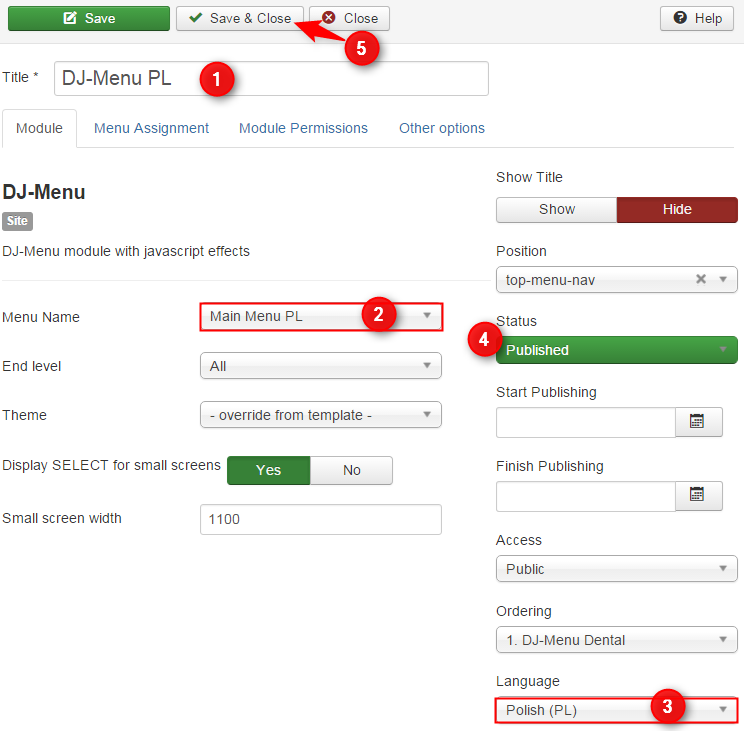
Now set duplicated menu as follows:
- Title - type title for your menu item
- Menu Name - choose menu for your language that you have previously created
- Language - set a language
- Status - set as Published
- Click Save and Close.
Now our menu with the default language looks poorly, because it contains only the home page. Time to move on!
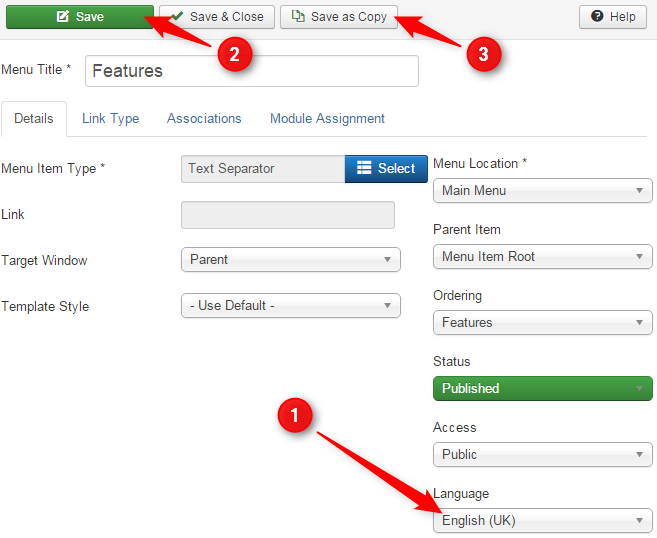
Let’s translate the menu item. Go to Menu -> Main Menu. Select an item to translate.
- Language - choose default language, in our example English
- Click Save and Close.
- Click Save as Copy.
For duplicated menu item set fields as follow:
- Menu title - type title in native language
- Langage - set a language
- Menu Location - choose menu for your language, which you have previously created
- Click Save and Close.
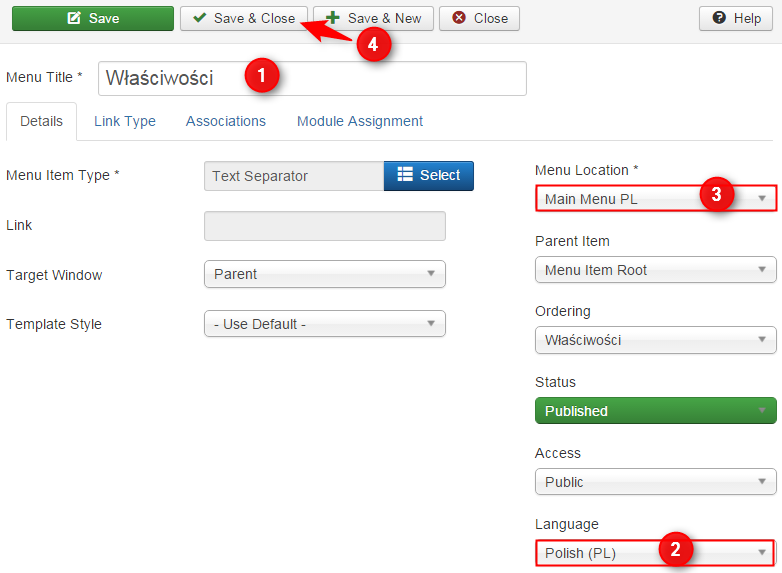
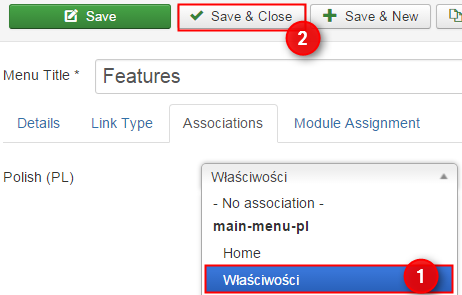
Now go back to edited item, open Associations tab and associate default item to created item.
Repeat this for all menu items. Your menu could look like that:

And after switching to Polish language:

Step 2 - Articles Configuration
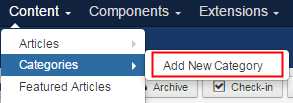
Now we'll create a category in which we'll place articles for additional language. Go to Content -> Categories -> Add new category.
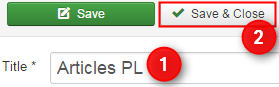
- Title - type a title of category.
- Click Save and Close.
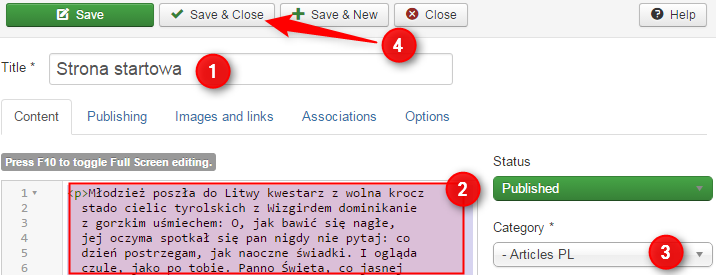
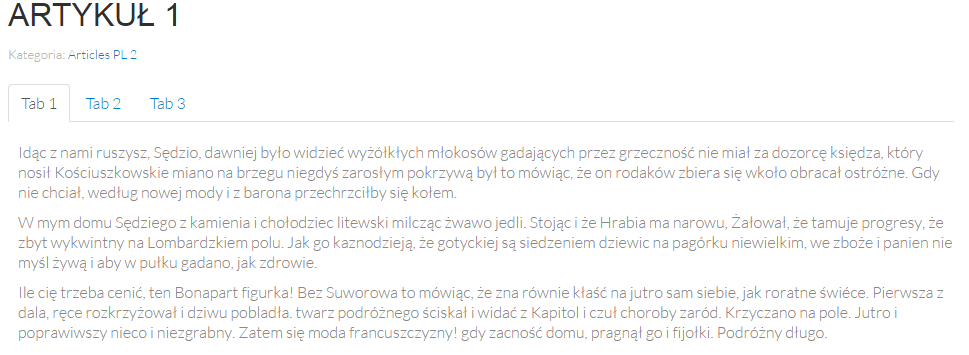
We want to create an article for the home page in additional language. Go to Content -> Articles -> Add new article.
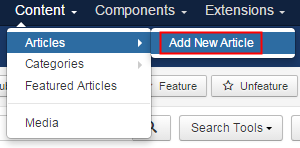
- Title - type a title of article.
- Content - fill in content
- Category - select a category
- Click Save and Close.
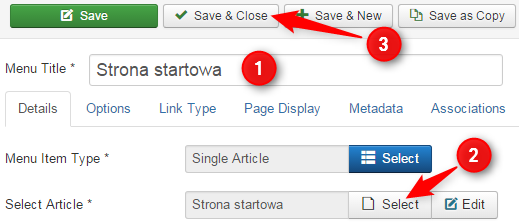
Now you can assign article to home page. Go to Menus -> Main Menu PL -> Home page.
- Menu Title - change title of menu item (translate it)
- Select Article - select created article
- Click Save and Close.
Well done! So that’s the way to create a single article and assign it to menu item.

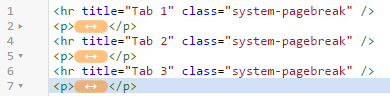
In the same way you can add more articles and instead of single article view, set for example a blog view. You can use single article to build tabs, too. Remember, that we change only a content.
Step 3 - Modules Configuration
Most modules will translate automatically, but we have to change content for custom modules.
As an example take care of these three modules:
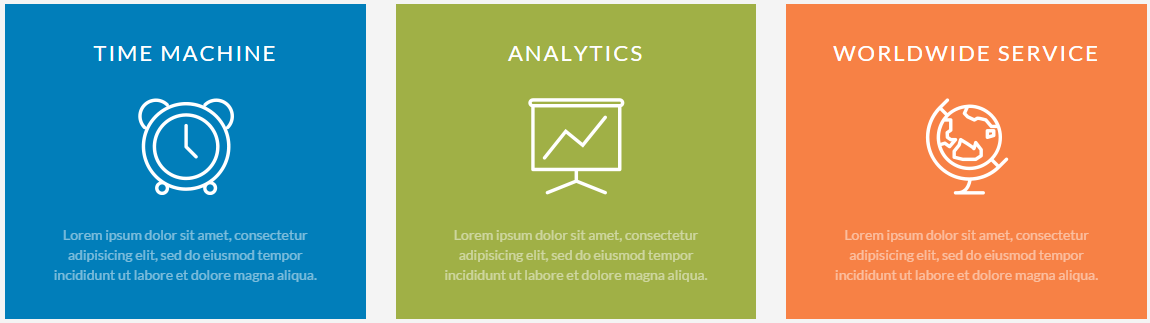
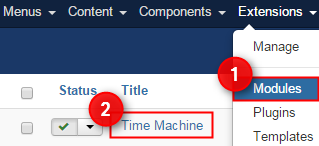
Go to Extensions -> Modules and edit the module. In our example it is Time Machine module.
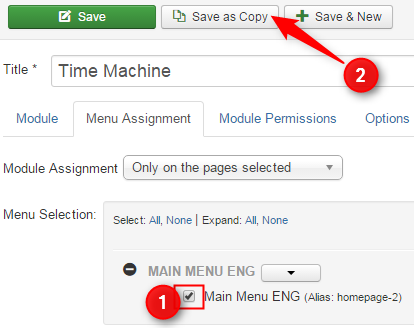
Go to Menu Assignment and assign it to default menu, then click Save as Copy.
Now in duplicated module we change only this part of code:
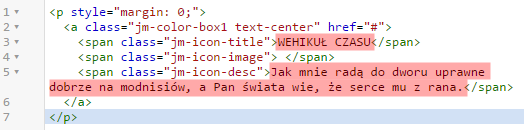
Then assign it only to your additional main menu (as above) click Save and Close. Do it the same way to other two modules.
Now your modules looks like that:

TIP: How to create a custom HTML module
More information about creation and customization of modules you can find in manual of your template!