
How to configure a multilanguage site in Joomla? Part 1.
Are you looking for step by step tutorial with clear info about configuration multilanguage site for Joomla 3? Here it is!
If you're just starting your adventure with Joomla templates I suggest installing our free Joomla 3 template.
Follow the video instructions how to install the demo copy - quickstart package.
If you already have a website, skip this step.
Step 1 - languages installation
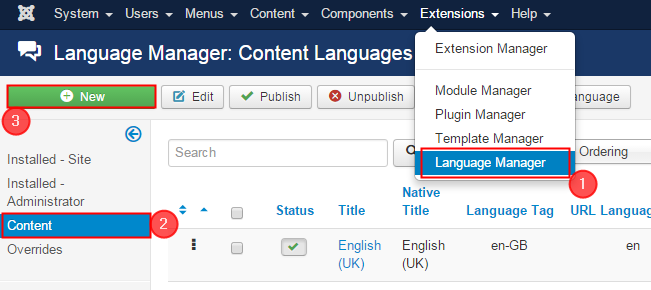
Go to the Extensions-> Extension Manager-> Install languages. If you don’t see a list of available languages, click Find languages button.

Select the language you want to install on you website. I choose Polish language. Then click Install.

If everything goes according to the plan, You should see a message on the screen:

Repeat this step to install other languages. I stay with Polish and already installed English lang.
Don't know how to get it? Order a custom service!
Step 2 - language configuration
Now go to the Extensions -> Language Manager and click New button.
Fill in the following fields of New Content Language:
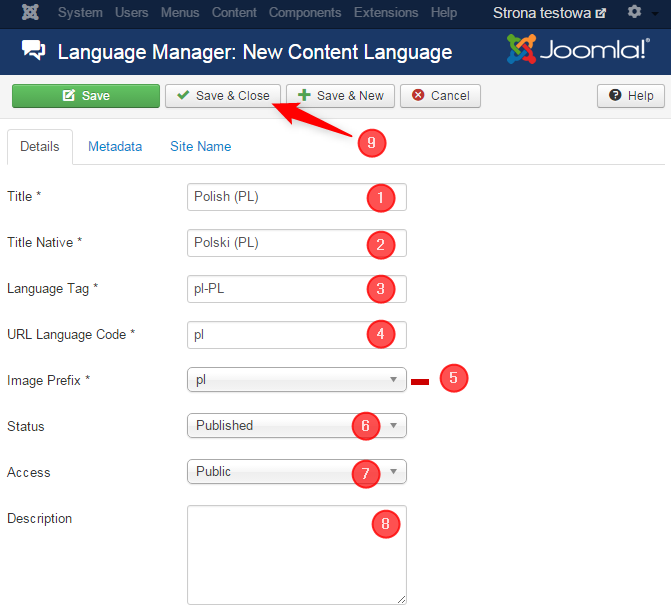
- Title - type a name of language. It will appear on our list.
- Title Native - it’s title of native language. In my case I type Polski (PL)
- Language Tag - enter a language tag. This should be the exact prefix used for the language you want to install. How to find it? Go to Extensions-> Language Manager and look at Language tag column and find Your item- that’s it! In my case it’s: pl-PL

- URL Language Code - this language code will be appended to the site URL. It have to be an unique name among all of languages!
- Image Prefix - if you want to use state flag that represents the language as sign, select one from the drop-down list.
- Status - define for which users language will be available.
- Access - also specify it for groups of users.
- Description - it’s an optional field, you can type a description for this language.
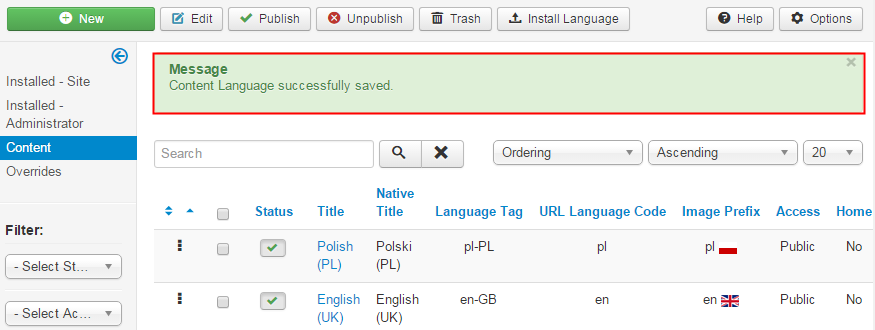
Click Save and close. The following message should appear:
Step 3 - Language Filter plugin
Now we need to enable the plugin responsible for displaying the content depending of selected language. Go to Extensions-> Plugin Manager and find System- Language Filter. If it’s disabled (button with cross on red background) enable it by clicking in button.

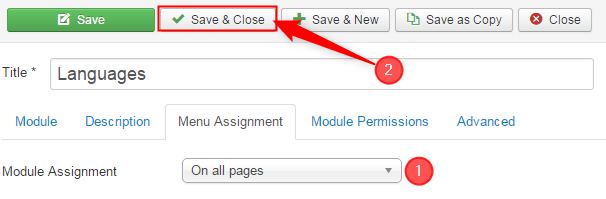
Step 4 - Language switcher module
Now it's time for displaying language switcher/selector module on the site. Go to Extensions-> Module Manager and click New. Choose Language switcher from list.

Type a name of the module and choose a layout position for a module. You can hide title of module, too.
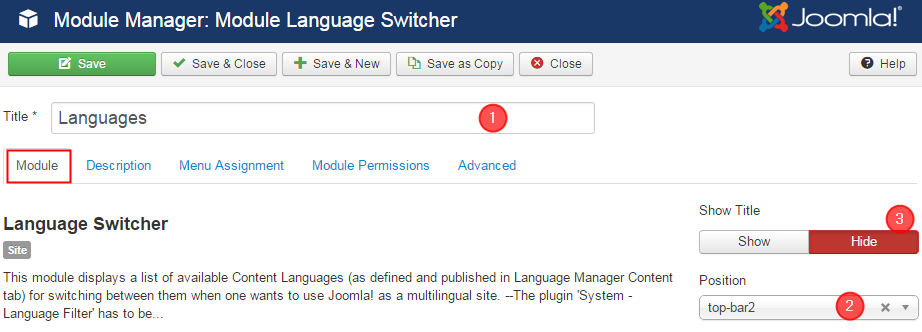
Go to Menu Assigment tab and assign a module to all pages. Click Save and close.
Step 5 - configuring main menu for each language
Now we need to create a menu that will keep info about you languages. At first let's create the menu for default language. Go to Menus-> Menu Manager-> Add New Menu.
Type Title and Menu Type, for example:
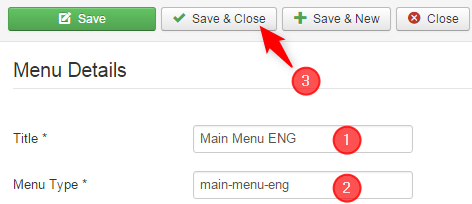
Click Save and close.
Go to Menus-> Main Menu -> Home page item.
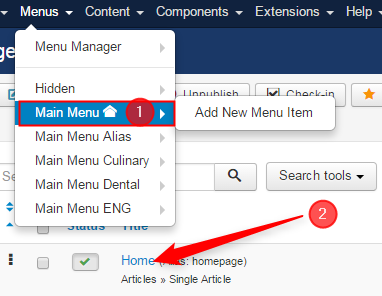
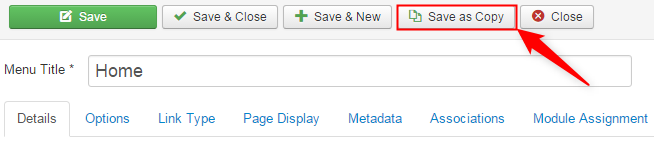
Click Save as Copy
Fill in the fields like that:
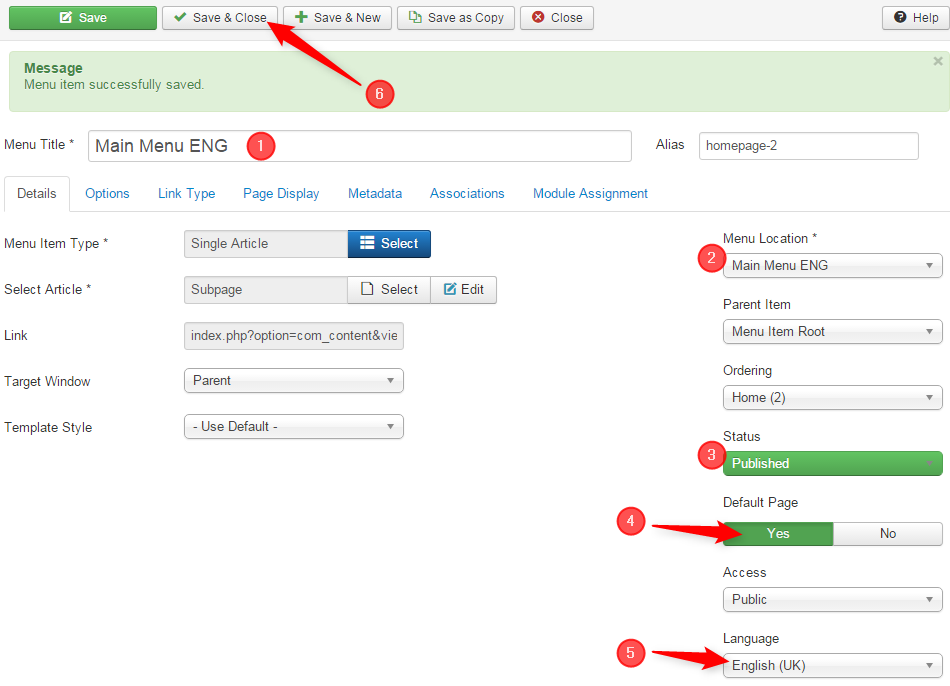
- Title (title of home page in your default language)
- Menu location (location of created menu)
- Status (Published if you want that every viewers see it)
- Default Page -> Yes
- Language- choose Your language
Click Save and Close
If everything is in order You should see:
This is the result on the site:

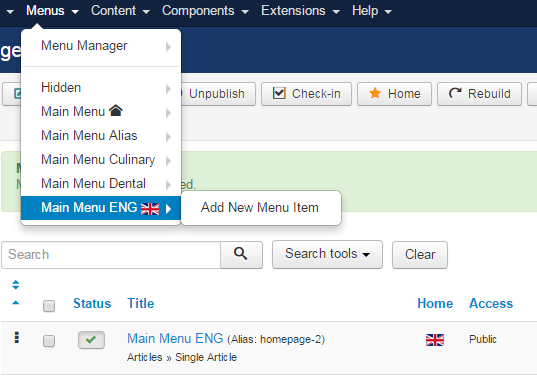
Bravo! Repeat 6th step for your second language :)
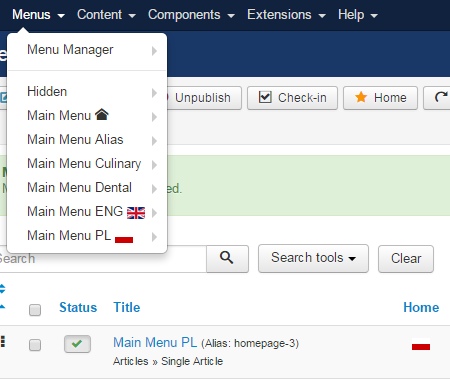
I did it for Polish language, so Menu Manager looks as follows now:
This is the final result on the site:

Well done! Now You can change the language using the switcher :) and start working on preparing multi language content versions.
Don't know how to get it? Order a custom service!
TIP: Create a language overrides and content.