Amp theme for Joomla website - step by step tutorial.
What is AMP?
AMP (Accelerated Mobile Pages) is an open source project started by Google which aims to create fast and high-performance websites across many platforms.
AMP pages are built with 3 core components: AMP HTML, AMP JS, and AMP Cache. Thanks to them AMP pages are loading almost instantly on mobile devices.
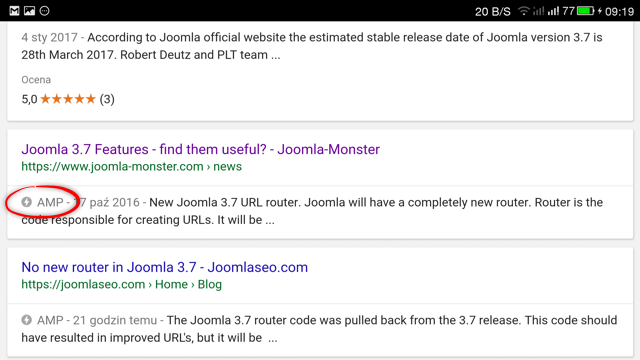
What is more, AMP pages are included in Google Search results. They appear in the "Top Stories" section of Google Search as well as across the entire mobile search results page. According to Google's statistics, AMP pages are loading in less than 1 second, and they consume 10 times less data than standard web pages. All this results in a huge increase of AMP project popularity.
More about AMP project you can read in our previous article and official documentation:
Who is AMP for?
According to Google, there are over 850 000 domains publishing AMP pages at this moment. Google AMP is most suitable for:
- news articles
- blog pages
- recipe pages
- product listings
- product pages
- classifieds listings
- classified ad pages
What do you need to display AMP pages on a Joomla website?
1. wbAMP plugin
wbAMP is a Joomla plugin that integrates AMP project guidelines with Joomla websites. It comes with two versions: free community and full. The full version gives you much more settings and control over your AMP pages; it also includes support for 3rd party AMP themes.
By default, wbAMP plugin provides support for:
Joomla content component: Joomla contact form: Joomla modules:NOTE The wbAMP full version is required for using our JM Amp Theme on your Joomla website.
2. JM Amp - Joomla AMP Theme
JM Amp is a plugin that includes a theme for your AMP pages.
NOTE The theme supports the following views:
Joomla Category Blog
Joomla Single Article
DJ-Classifieds Category Blog and Table
DJ-Classifieds Single Ad
NOTE The theme supports the following modules:
DJ-Classifieds Items (default layout only), DJ-Classifieds Category Tree, DJ-Classifieds Menu, DJ-Classifieds Regions, DJ-Classifieds Stats, DJ-Classifieds User Menu, DJ-Classifieds User Points
Articles Archived, Articles Categories, Articles Category, Articles Newsflash, Articles Related, Breadcrumbs, Custom module, Feed Display, Footer, Language Switcher, Latest Users, Menu, Statistics, Tags Popular, Tags Similar, Who's Online
3. DJ-Classifieds component wbAMP support (optional, for DJ-Classifieds users only)
"com_djclassifieds wbAMP support" is a plugin that integrates DJ-Classifieds component with wbAMP. It is required for displaying DJ-Classifieds AMP pages on your Joomla website.
The plugin allows to display AMP pages for DJ-Classifieds category and single ad views:
And for several DJ-Classifieds modules compatible with AMP:
Worth to mention:
When you visit an AMP page from Google search results directly, you may notice that internal links on that page lead to non-AMP pages. This is a normal behavior for AMP pages. Google decides when to display AMP pages to users depending upon their device and network.
Some dynamic elements like "Contact this advertiser" may lead to non-AMP pages as well because AMP does not allow to include 3rd party scripts, which results in limited functionality. This is the cost of having a very fast loading pages.
NOTE At least 3.6.3 version of DJ-Classifieds is required for using "com_djclassifieds wbAMP support" plugin on your Joomla website.
How to display AMP pages on a Joomla website?
Step1: Download and install all required plugins.
Download the following plugins:
- wbAMP (full version)
- com_djclassifieds wbAMP support
- Joomla AMP Theme
Next, install each downloaded package on your Joomla website as follows:
From the top bar menu, click on "Extensions → Extension Manager."
1) On the "Upload Package File" tab – browse your hard drive and select a plugin package, click on "Upload & Install."
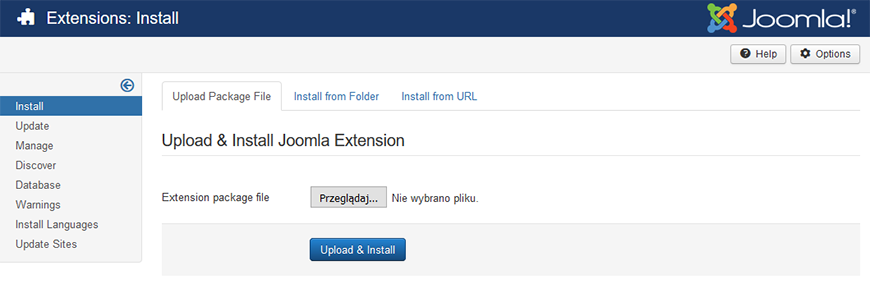
2) You should get a message saying that installation of the plugin was successful.

3) From the top bar menu, click on "Extensions → Plugin Manager." On this page, you will see a list of available plugins in your Joomla. Make sure that all previously installed plugins are published.
Step2: Configure the wbAMP plugin.
From the top bar menu, click on "Extensions → Plugin Manager."
Find the "wbAMP" plugin on the list and edit.
In this tutorial, we will focus on the settings required to configure wbAMP with our Joomla AMP Theme properly. We will skip optional settings. For more detailed documentation of wbAMP, please visit official wbAMP documentation.
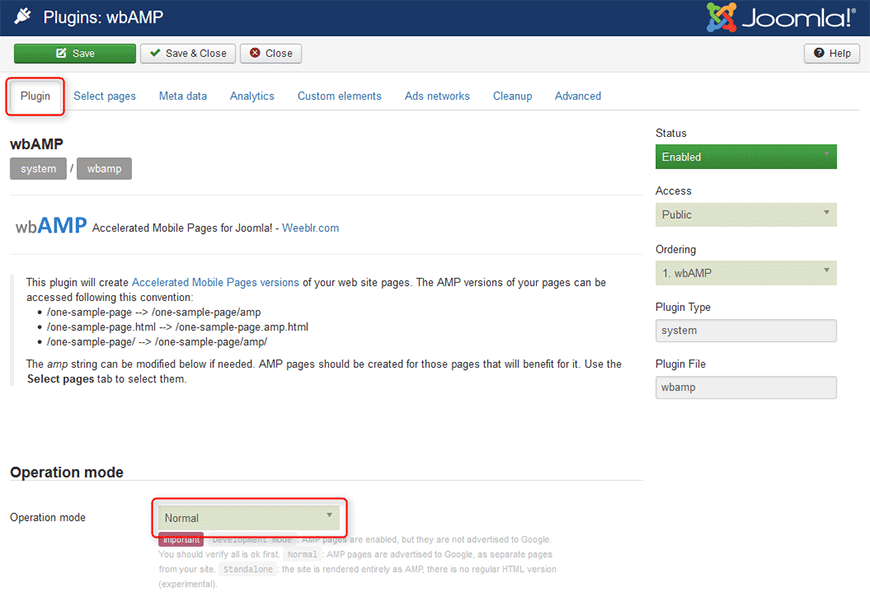
Tab: Plugin (required)
On this tab, you need to configure the plugin mode and select a proper theme.
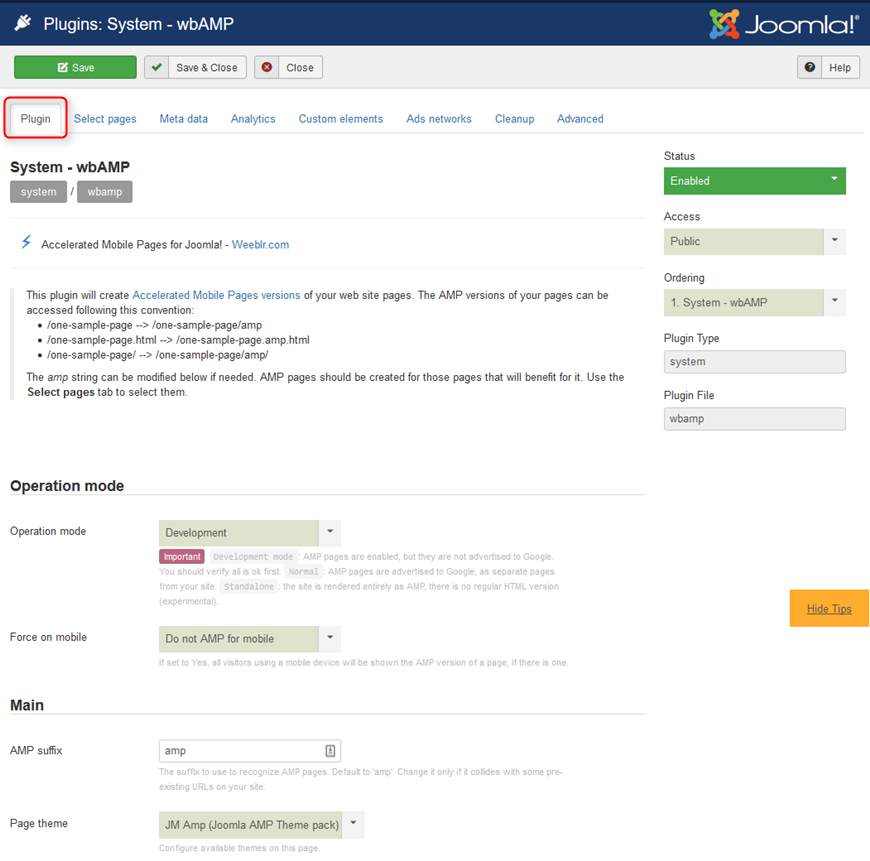
Worth to mention:
- Operation mode - select "Development" mode. Once you finish configuration and you will be sure your AMP pages are valid, then you can switch to "Normal." When "Development" mode is enabled, AMP pages can be displayed on your site, but they will be not visible for Google bots.
- Page theme - select Joomla AMP Theme to set this theme as default one.
More details in the official documentation.
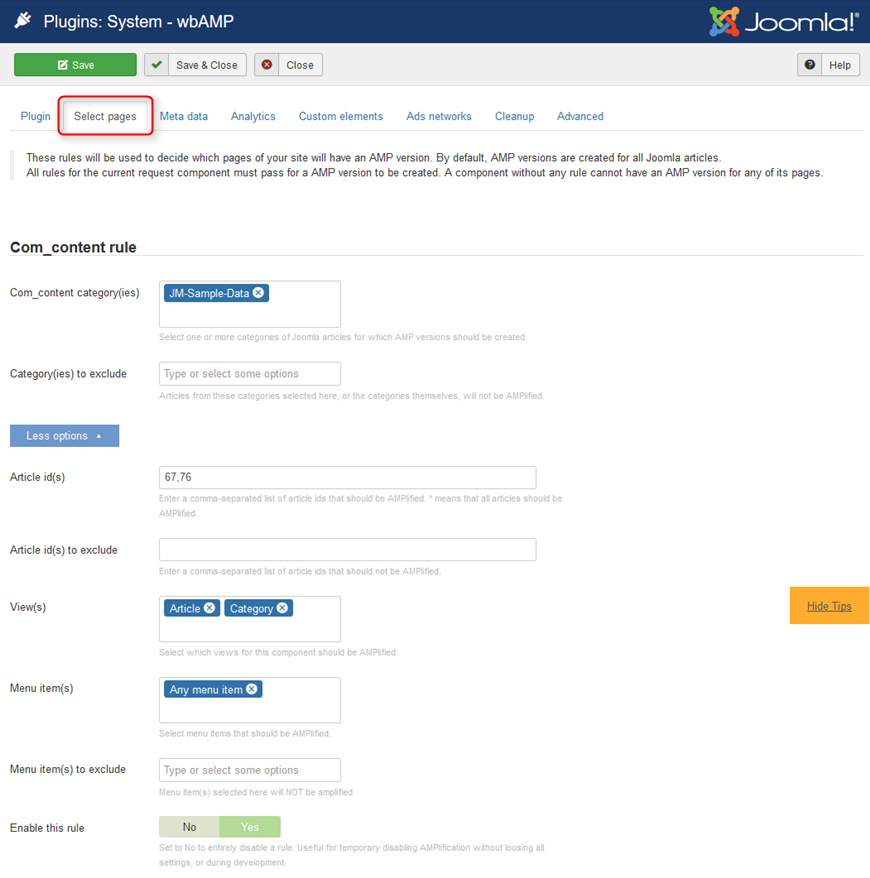
Tab: Select Pages (required)
On this tab, you need to set pages for which you want to display AMP pages.
AMP pages taken from Joomla content
If you want to display AMP pages for all Joomla blog category and article pages:

Worth to mention:
- Com_content category(ies) - select categories for which you want to display AMP pages
- Article id(s) - type id(s) of articles to display AMP pages for selected articles only (comma separated). Type "*" to choose any article
- View(s) - select views for which you want to display AMP pages, you can choose "category," "article" or both
- Menu item(s) - select menu items to display AMP pages for selected menu items only
If you want to display AMP pages for selected blog categories or selected articles, you can use the "Com_content category(ies)" and "Article id(s)" rules, for example:
AMP pages taken from DJ-Classifieds content
On the "Select pages" tab scroll down to the "Rule set 1" section to configure rules for DJ-Classifieds AMP pages.
If you want to display AMP pages for all DJ-Classifieds category and single ad pages:
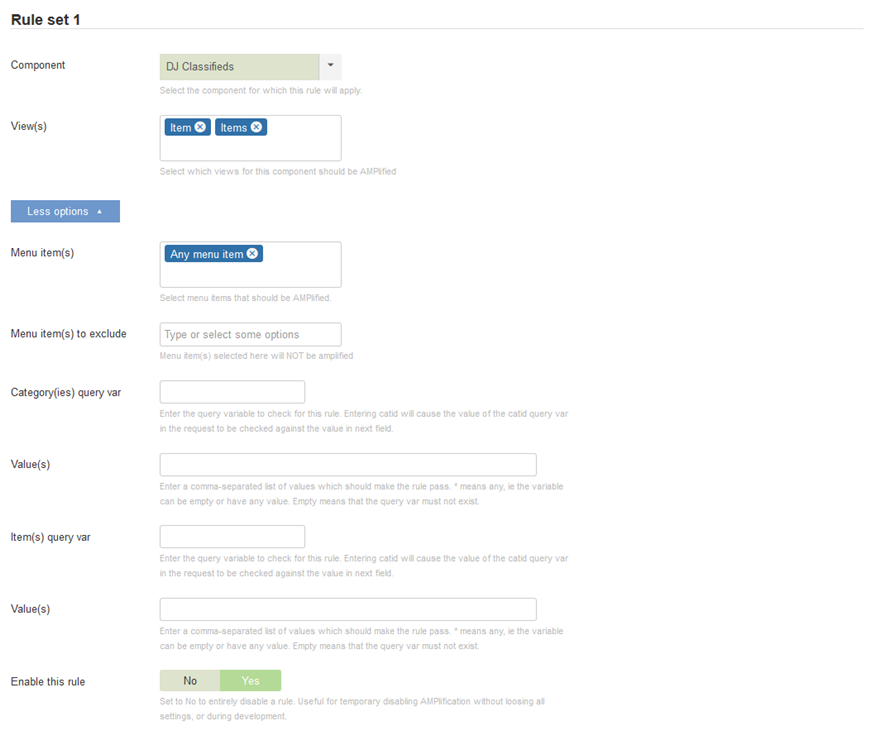
Worth to mention:
- Component - choose "DJ-Classifieds"
- View(s) - select views for which you want to display AMP pages, you can choose "items," "item" or both
- Menu item(s) - select menu items to display AMP pages for selected menu items only
- Category(ies) query var - type "cid" as DJ-Classifieds category query var if you want to display AMP pages for selected categories
- Value(s) - type id(s) of DJ-Classifieds categories for which you want to display AMP pages (comma separated)
- Item(s) query var - type "id" as DJ-Classifieds item query var if you want to display AMP pages for selected items
- Value(s) - type id(s) of DJ-Classifieds items for which you want to display AMP pages (comma separated)
If you want to display AMP pages for selected categories or selected ad pages, you can use the "Category(ies) query var", "Item(s) query var" and "Value(s)" rules, for example:

More details in the official documentation.
Tab: Meta Data (required)
On this tab, you need to configure meta data information. It is important to fill them correctly. Otherwise, your AMP pages may not validate successfully:
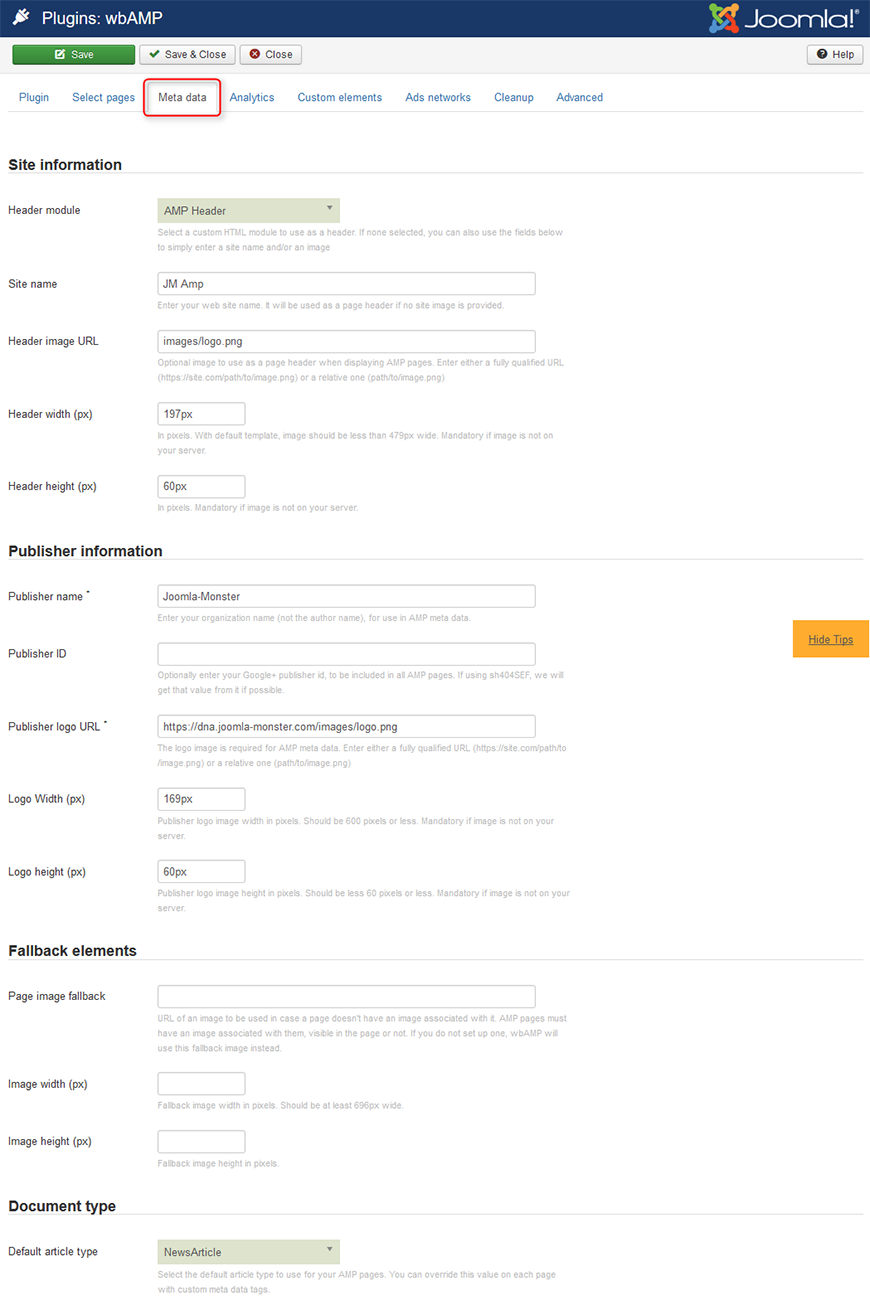
More details in the official documentation.
Tab: Analytics (optional)
On this tab you can configure your Google Analytics account to track AMP pages:
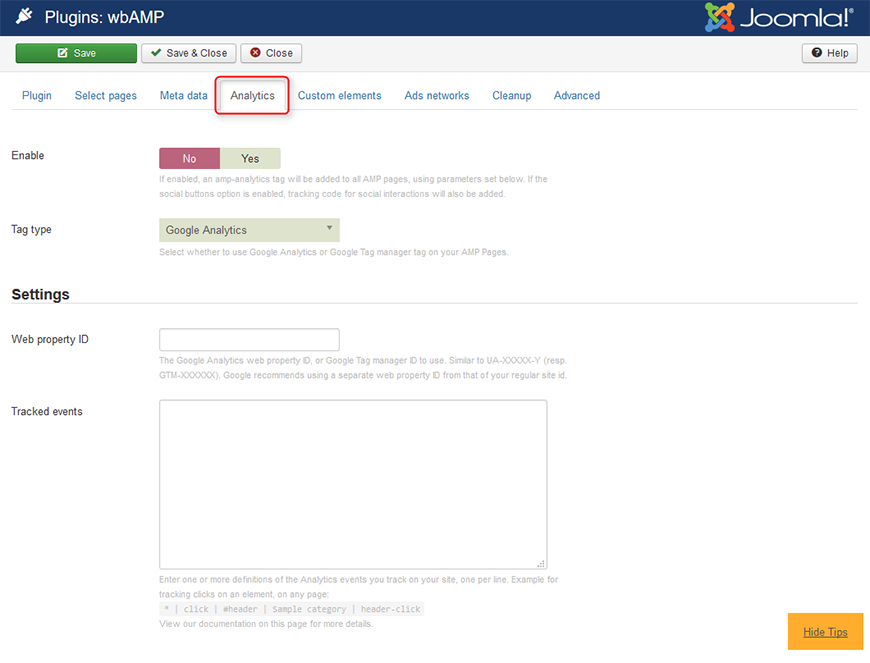
More details in the official documentation.
Tab: Custom elements (optional)
On this tab, you can configure some additional elements on your AMP pages.
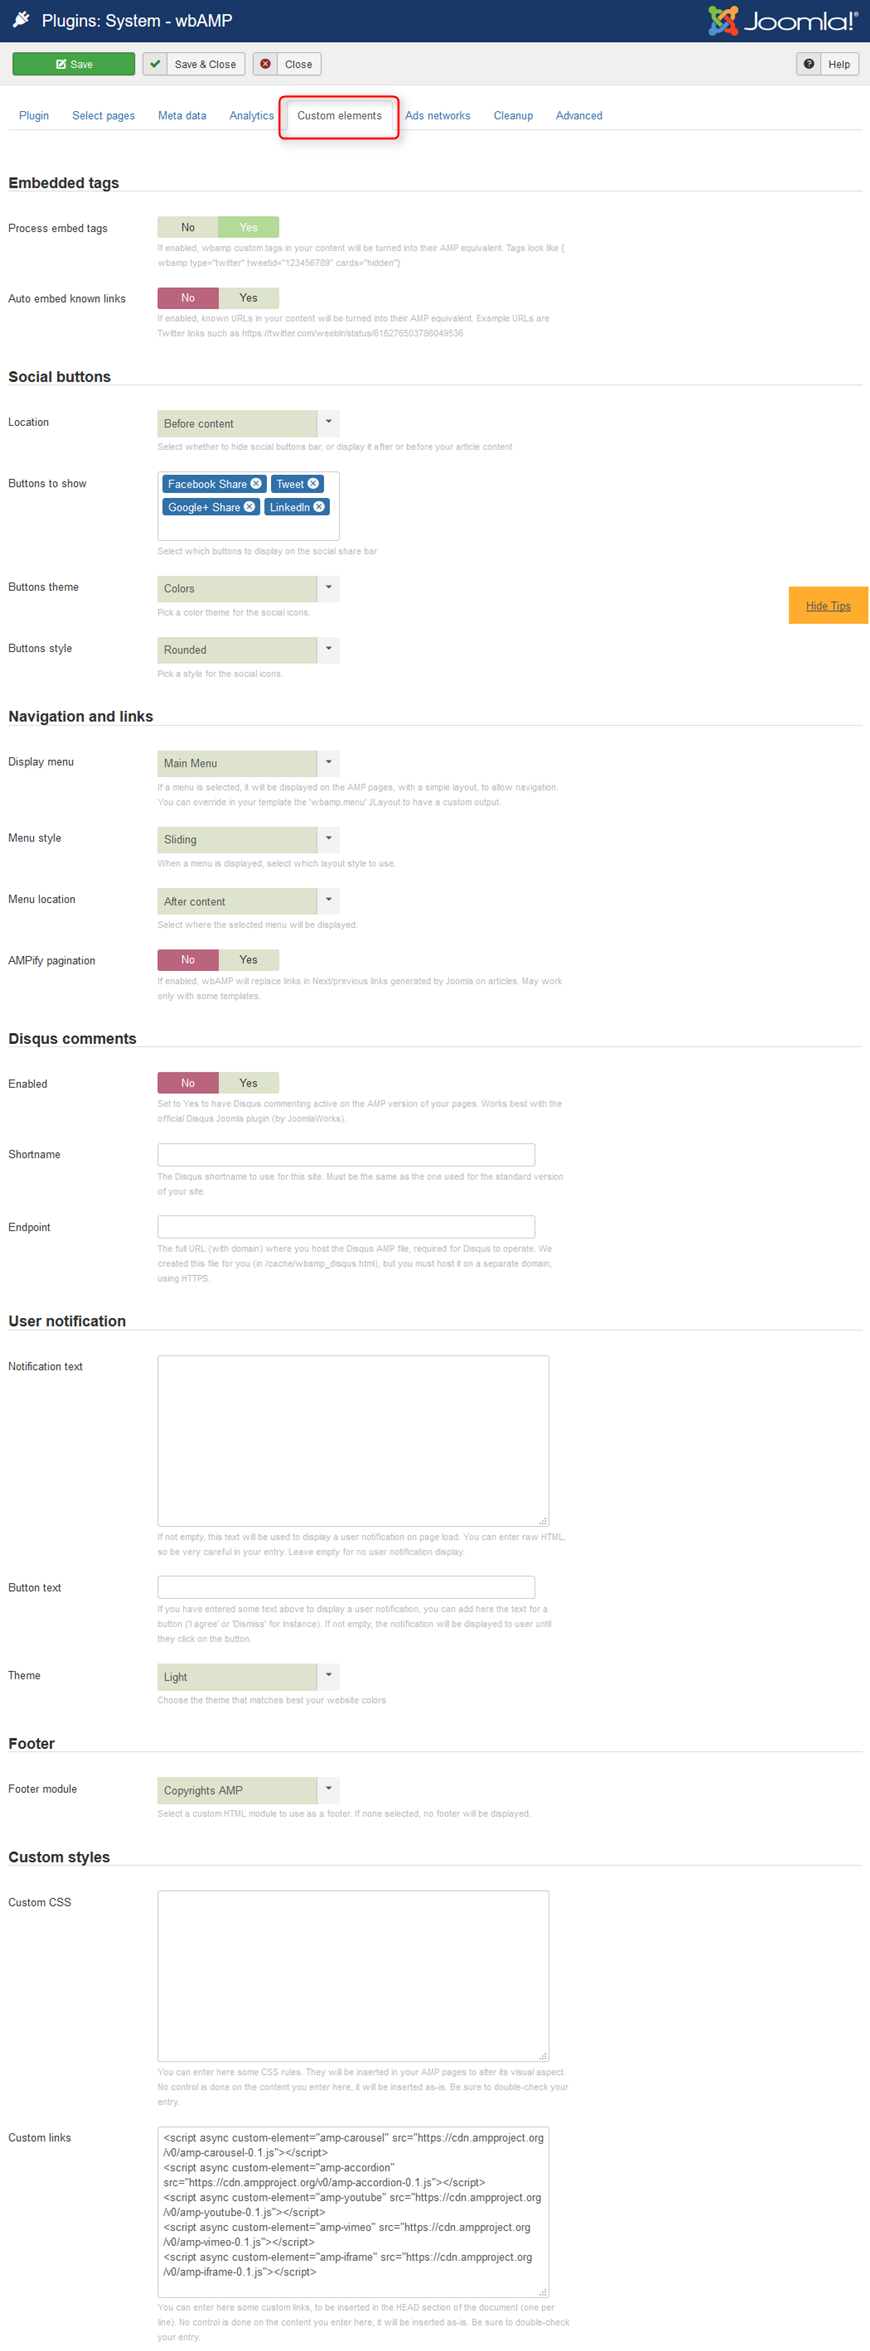
Worth to mention:
Custom links - DJ-Classifieds requires some additional AMP scripts to work properly. Copy and paste the following scripts into that field:
<script async custom-element="amp-carousel" src="https://cdn.ampproject.org/v0/amp-carousel-0.1.js"></script>
<script async custom-element="amp-accordion" src="https://cdn.ampproject.org/v0/amp-accordion-0.1.js"></script>
<script async custom-element="amp-youtube" src="https://cdn.ampproject.org/v0/amp-youtube-0.1.js"></script>
<script async custom-element="amp-vimeo" src="https://cdn.ampproject.org/v0/amp-vimeo-0.1.js"></script>
<script async custom-element="amp-iframe" src="https://cdn.ampproject.org/v0/amp-iframe-0.1.js"></script>
More details in the official documentation.
Tab: Ads networks (optional)
On this tab, you can configure displaying of advertisements on your site.
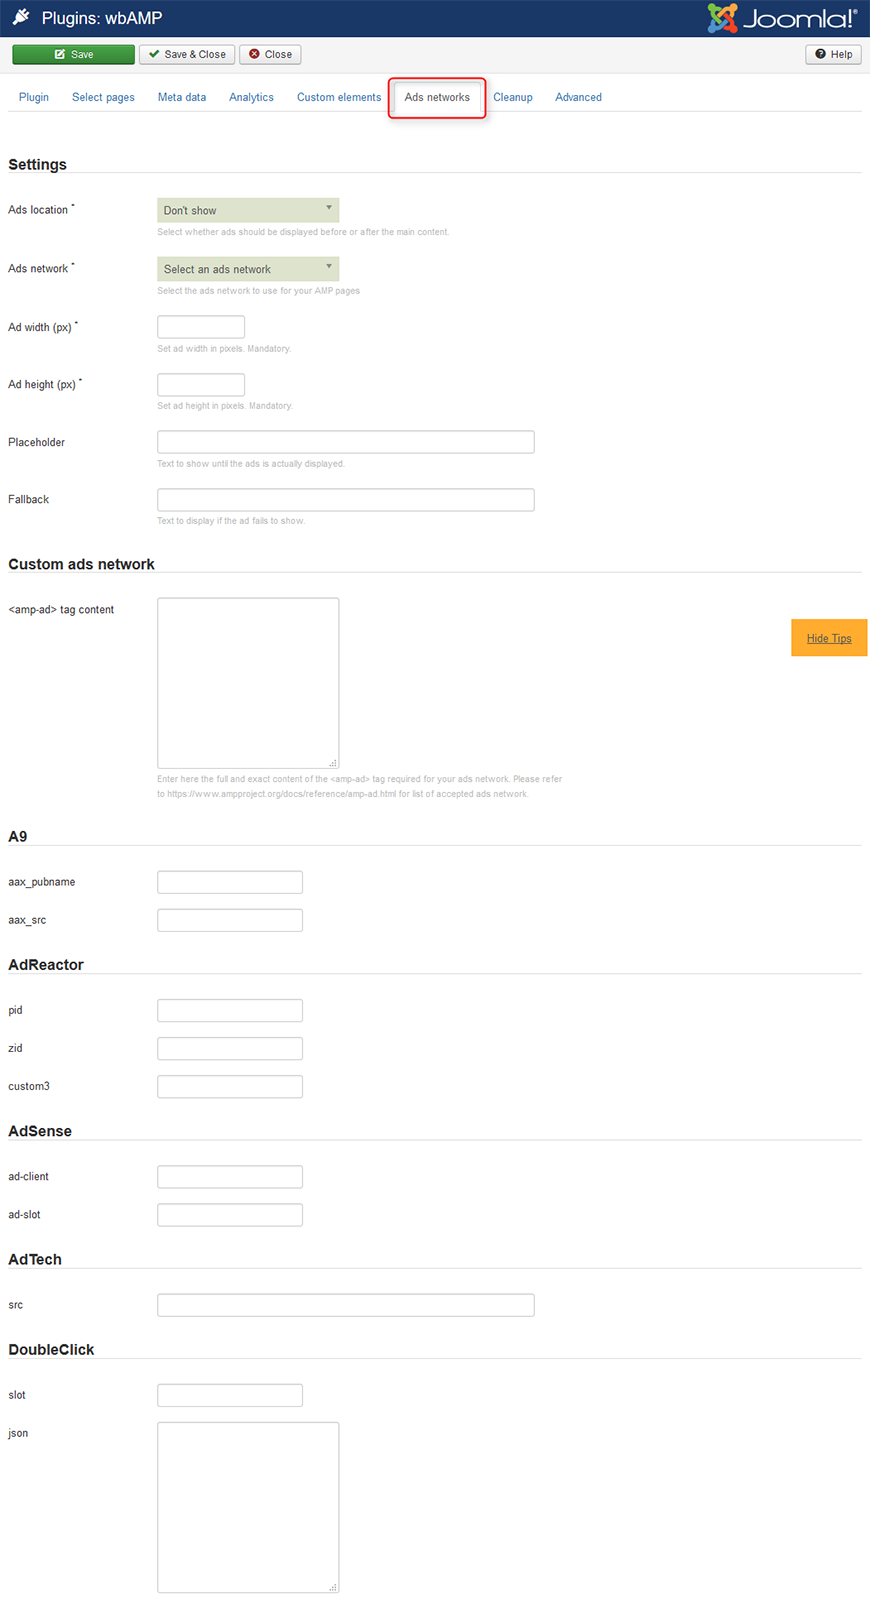
More details in the official documentation.
Tab: Cleanup (optional)
On this tab, you can configure some cleanup settings.
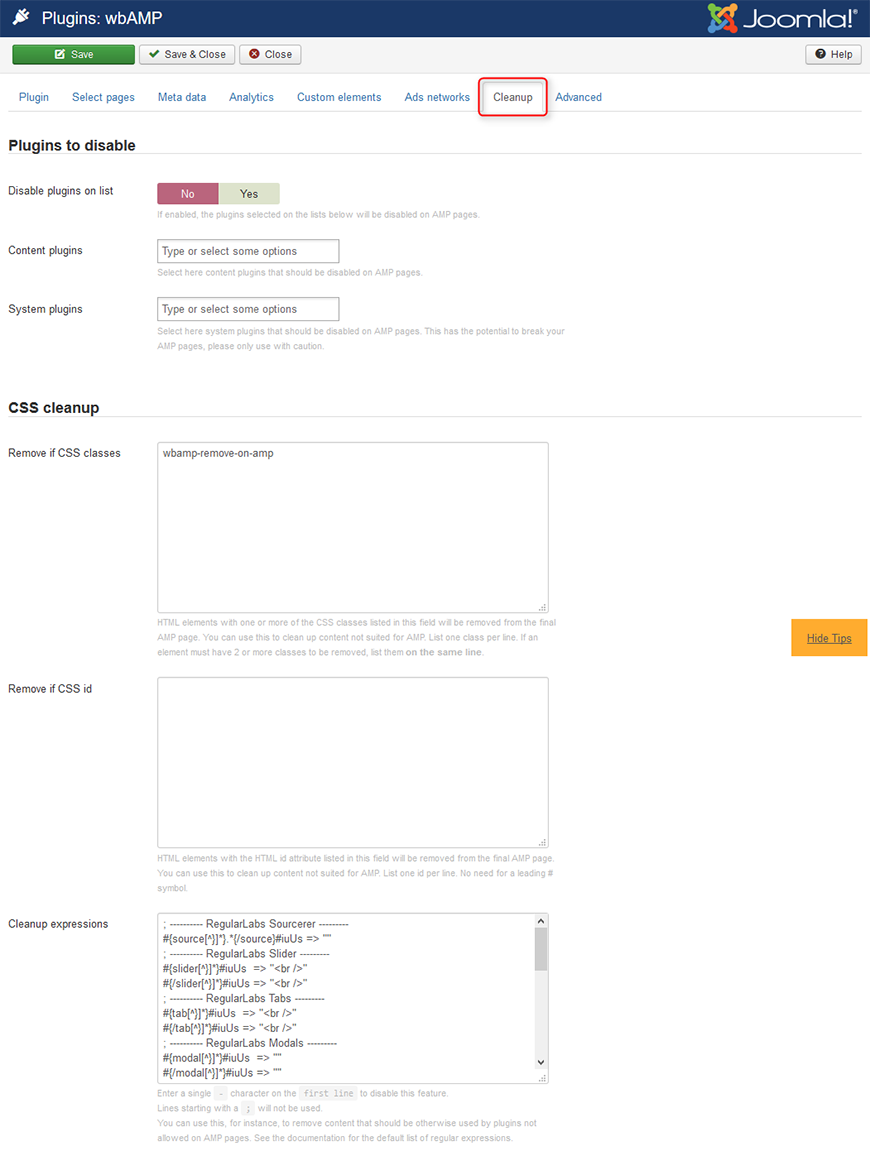
More details in the official documentation.
Tab: Advanced (optional)
On this tab, you can configure some advanced settings.
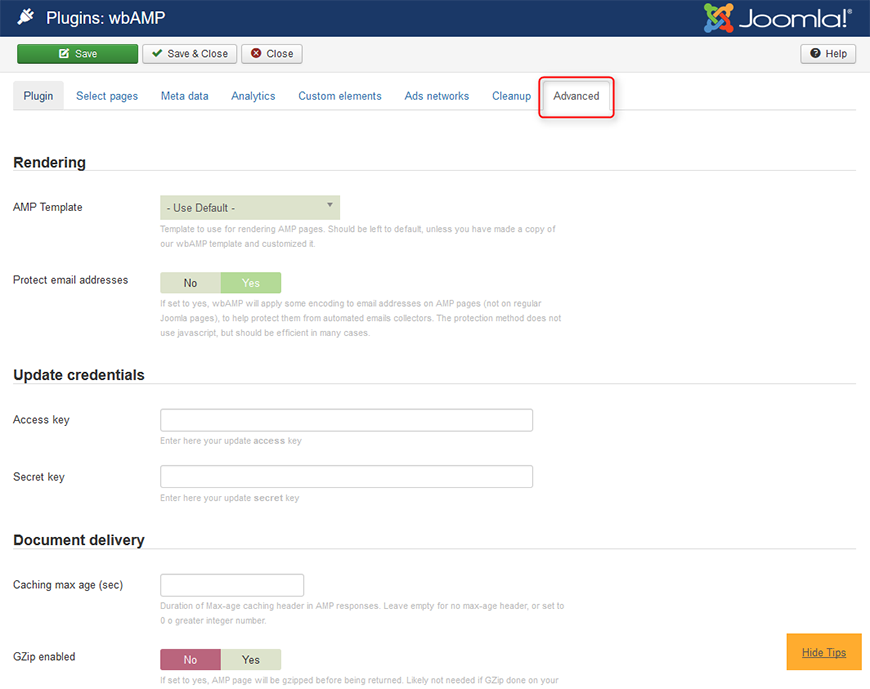
More details in the official documentation.
Step3: Configure Joomla AMP Theme
From the top bar menu, click on "Extensions → Plugin Manager."
Find the "JM Amp - Joomla AMP Theme" plugin on the list and edit.
NOTE The "JM Amp - Joomla AMP Theme" plugin contains settings for changing colors and font settings only. All the rest settings related to AMP Pages, you need to configure in the "wbAMP" plugin.
Tab: Global
On this tab, you can configure font and color settings globally.
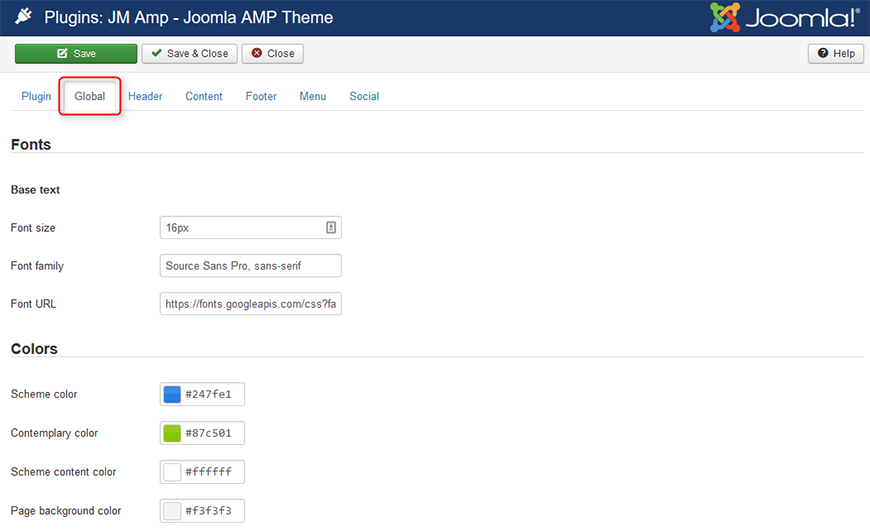
- Font size - font size for global font
- Font family - font family for global font
- Font URL - if you want to use, for example, Google Web Fonts, you can enter the font URL into this field
- Scheme color - color used for several elements in the theme, for example links, tags, pagination
- Scheme content color - color used for content if an element is using scheme color as background
- Page background color - background color of the outer page
Tab: Header
On this tab, you can configure color settings for the header section.
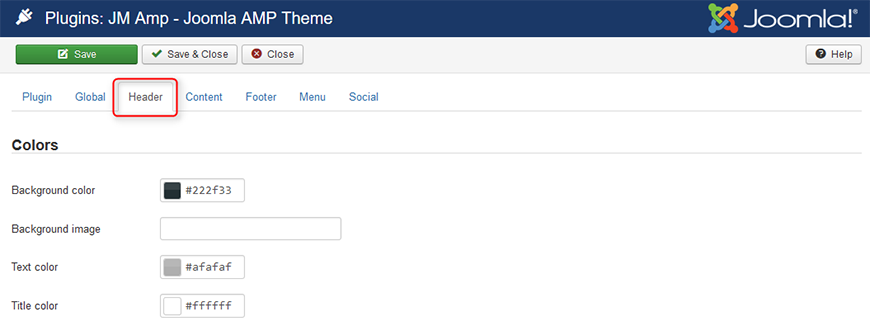
- Background color - background color of the header section
- Background image - if you want to display an image as header background, you need to enter an image path as follows: URL(http://www.example.com/images/header-image.jpg)
- Text color - color of text in the header section
- Title color - color of title in the header section
Tab: Content
On this tab, you can configure color settings for the content area.
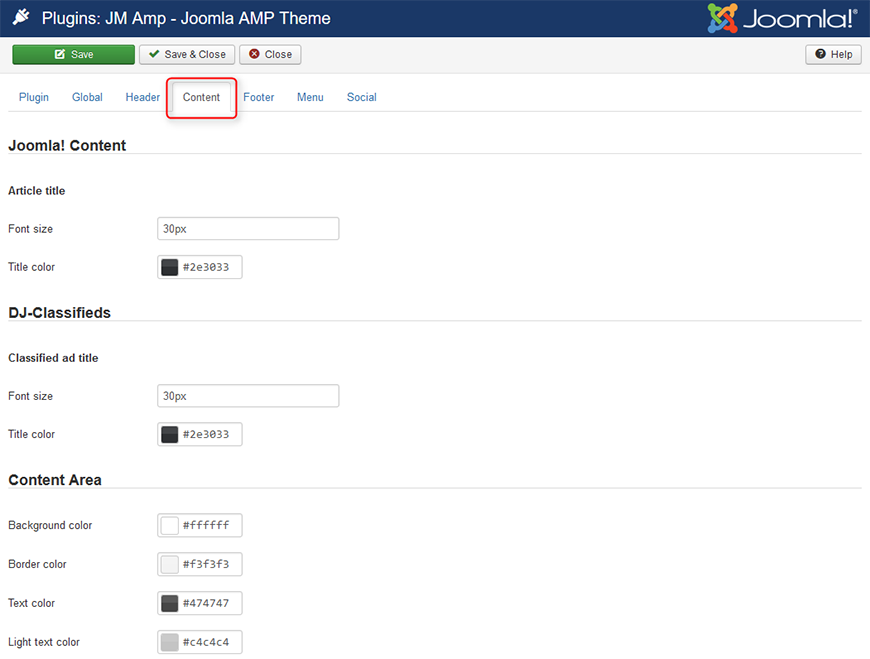
Joomla! Content
- Font size - font size of article titles in Joomla views
- Title color - color of article titles in Joomla views
DJ-Classifieds
- Font size - font size of ad titles in DJ-Classifieds views
- Title color - color of ad titles in DJ-Classifieds views
Content area
- Background color - background color of the content area
- Border color - border color used for borders in the content area
- Text color - color of text in the content area
- Light text color - color of the text in the content area, for example article info, pagination, DJ-Classifieds bids.
Tab: Footer
On this tab, you can configure color settings for the footer section.
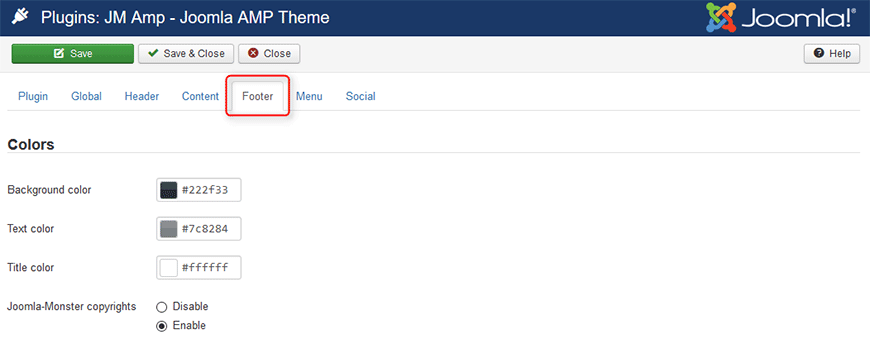
- Background color - background color of the footer section
- Text color - color of text in the footer section
- Title color - color of title in the footer section
- Joomla-Monster copyrights - show/hide Joomla-Monster copyrights link
Tab: Menu
On this tab, you can configure color settings for the menu section.
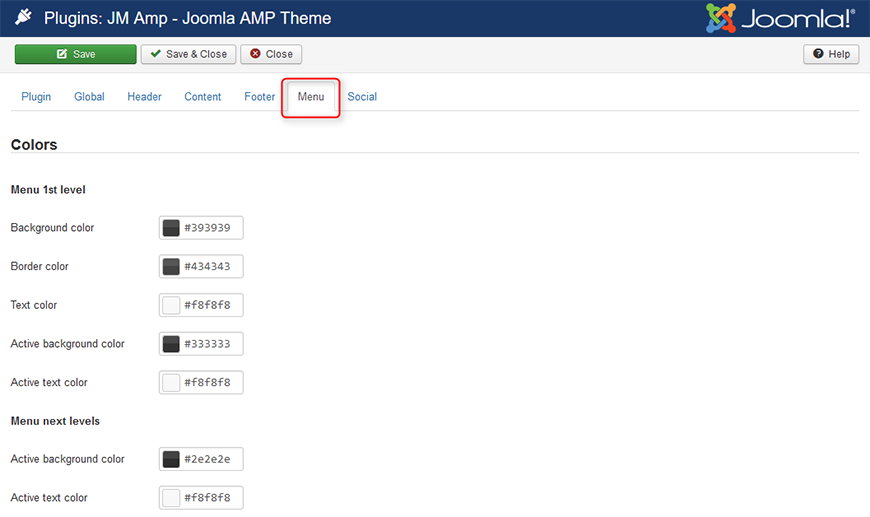
Menu 1st level
- Background color - background color of 1st level menu items
- Border color - border color of 1st level menu items
- Text color - text color of 1st level menu items
- Active background color - background color on active state of 1st level menu items
- Active text color - text color on active state of 1st level menu items
Menu next levels
- Active background color - background color on active state of next level menu items
- Active text color - text color on active state of next level menu items
Tab: Social
On this tab, you can configure color settings for the social icon section.
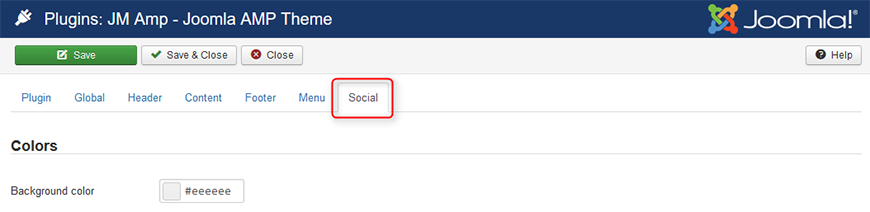
- Background color - background color of the social bar
Step4: Check if your AMP pages work.
After configuring wbAMP plugin, you should be able to display your AMP pages by adding “amp” suffix to URL address, for example:
| Standard page address: | AMP page address: |
|---|---|
| www.domain.com/sample-page | www.domain.com/sample-page/amp |
| www.domain.com/sample-page.html | www.domain.com/sample-page.amp.html |
| www.domain.com/sample-page/ | www.domain.com/sample-page/amp/ |
NOTE If you get 404 component found error when visiting your AMP pages, probably you have some wrong settings on the “Select Pages” tab in the wbAMP plugin. Go back to the plugin and verify the settings.
Step5: Validate your AMP pages.
Once your AMP pages work fine, you can move on to validate them.
Here you can find some useful AMP validation tools:
- AMP pages validator: https://validator.ampproject.org
- Another AMP pages validator: https://search.google.com/search-console/amp
- Structural data validator: https://search.google.com/structured-data/testing-tool
Your AMP pages must be AMP valid. Otherwise, they will not be displayed in Google search results. The structural data on your AMP pages does not have to validate, but having correct structural data markup is important to present your content more prominently. Also, the "top news" carousel requires valid structural data.
Step6: Activate AMP pages for Google
If your AMP pages work and validate successfully, go back to the wbAMP plugin settings: "Extensions -> Plugins -> wbAMP"
- Operation mode - set "Normal" mode. Your AMP pages will appear in the mobile search results, once Google crawls them.
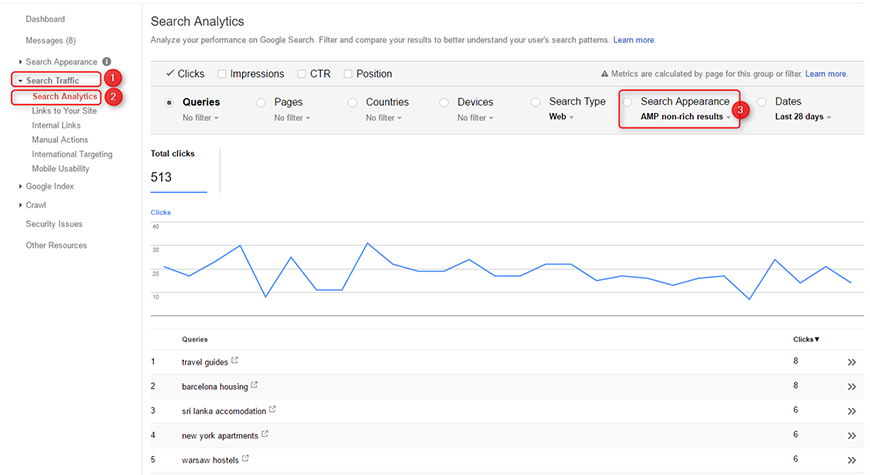
Monitor AMP Pages on Google Search Console
In Google Search Console you may find some very useful tools.
Search Analytics
It allows to check search analytics related to your AMP pages:
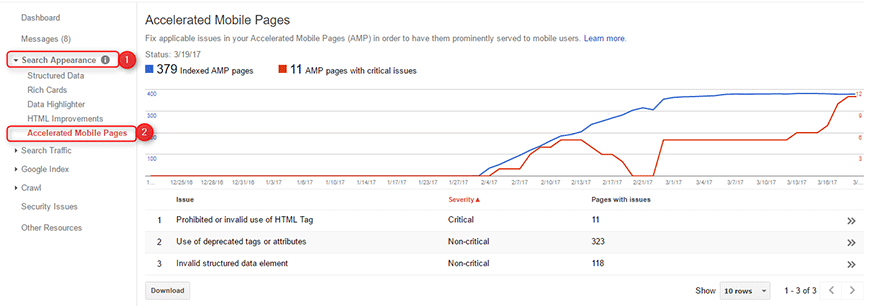
Search Appearance
It provides error reporting related to your AMP pages. If there are any problems with your AMP pages, they will be listed here.