How to create an article in Joomla?
If you are an administrator of a Joomla website, sooner or later you will need to create an article. This is a basic feature of Joomla CMS. In this tutorial you will find out, step by step, how to create a category for an article, how to create the article and, finally, how to display the article on your website.
How to create Joomla article category?
In the back-end of your site go to:
Content -> Categories -> Add New Category

On this page you will see a form of adding a new category. Let's take a look on the available settings.
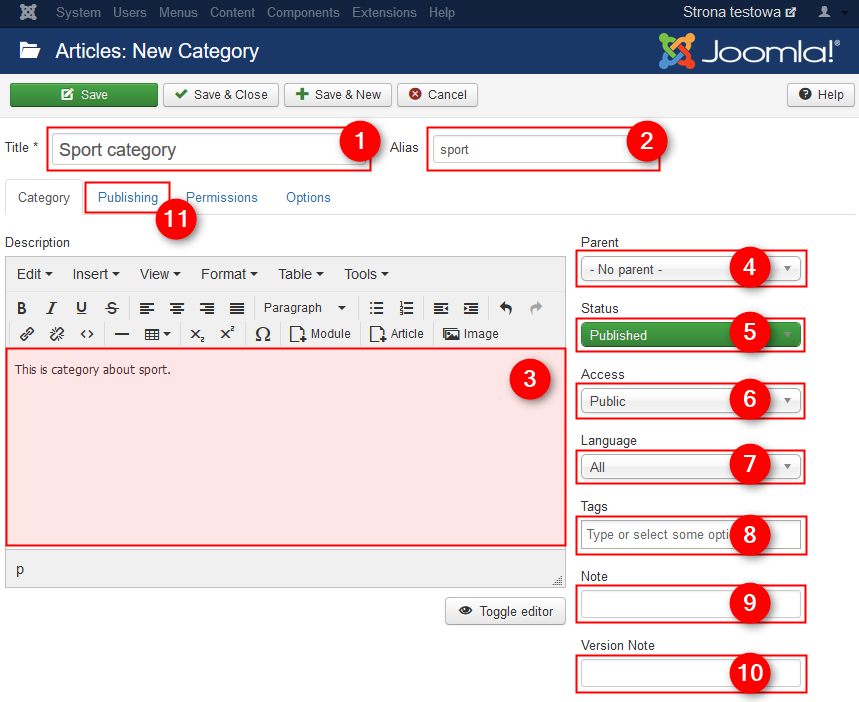
- Title - type a title of the category
- Alias - type an alias of the category (leave empty to create an alias from the category title)
- Descripton - type a description of the category
- Parent - choose a parent of the category. This option is helpful if you want to create a subcategory.
- Status - leave "Published" to publish the category after save
- Access - restrict access to the category. This option is useful if you want a specific usergroup to see this category, otherwise leave "Public".
- Language - choose a language for the category. This opiton is useful if you create a multilingual site, otherwise leave "All".
- Tags - type tags for the category
- Note - type a note. It is an optional note to display in the category list view.
- Version Note - it is an optional note for versioning of the category
- Move on to the "Publishing" tab
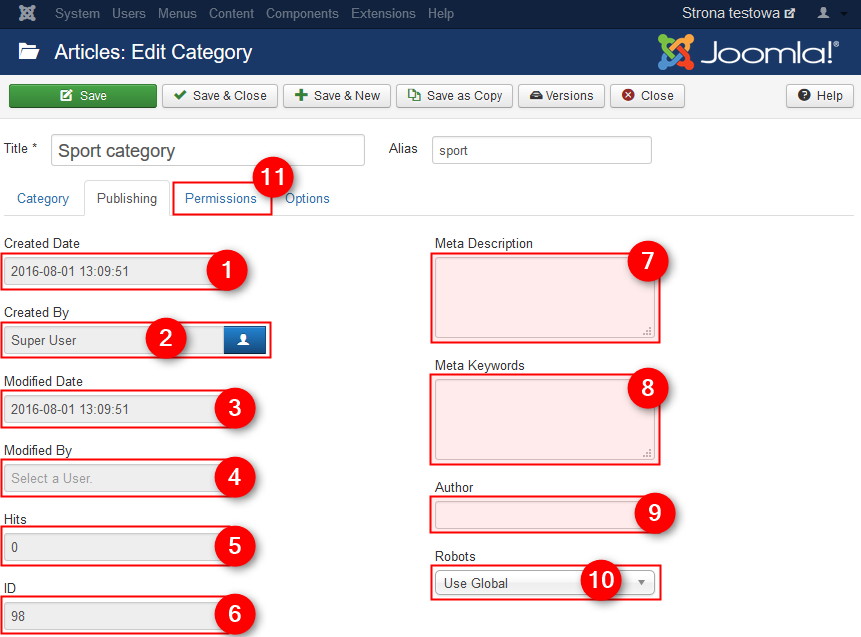
- Created Date - creation date of the category. It will be generated after saving the category.
- Created By - author of the category. You can change the author if needed.
- Modified Date - last modification date of the category. If someone will edit the category later, then the modified date will change.
- Modified By - user who modified the category last time
- Hits - number of hits for the cateogry
- ID - ID of the category. It will be generated after saving the category.
- Meta Description - type a meta description for SEO purpose
- Meta Keywords - type meta keywords for SEO purpose
- Author - type an author of the content for SEO purpose
- Robots - type the robots instructions
- Go to the "Permissions" tab
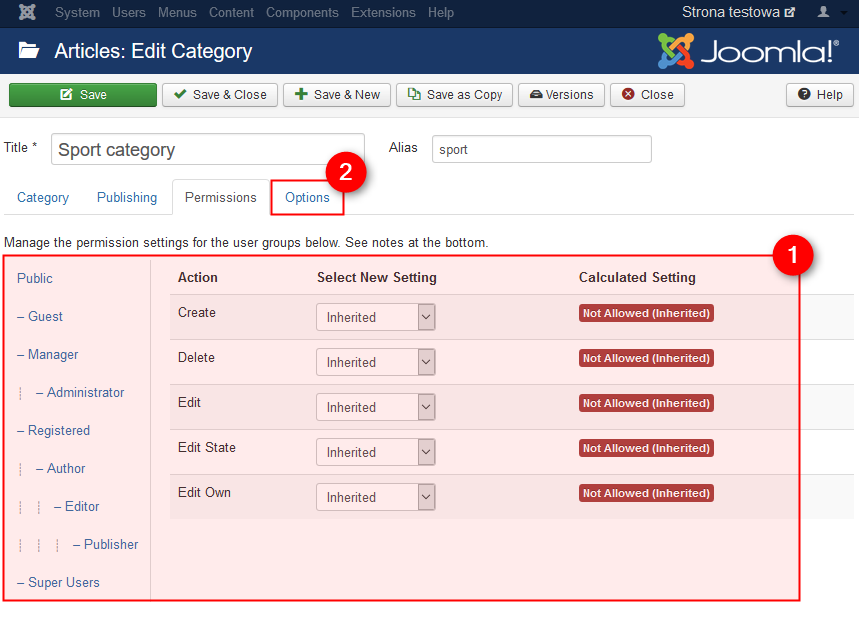
- Here you can specify permission levels for other users. Leave untouched if you want to use global permissions.
- Go to the "Options" tab.
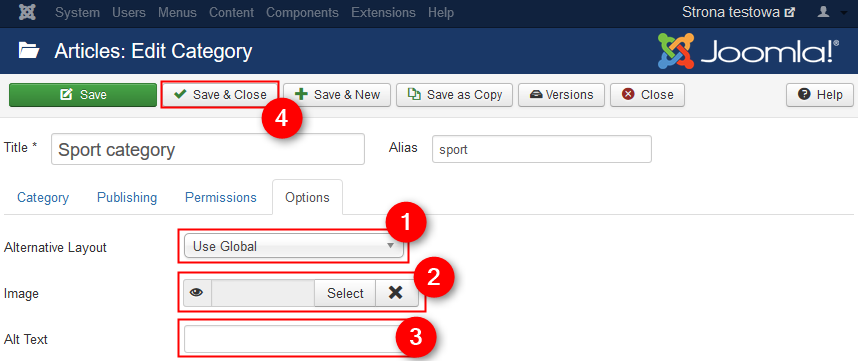
- Alternative Layout - here you can choose a blog or list layout for articles from this category. Leave untouched to use setting from the global options.
- Image - choose an image for the category
- Alt - type alternative text for the category image
- Once you complete filling all category details click on "Save & Close"
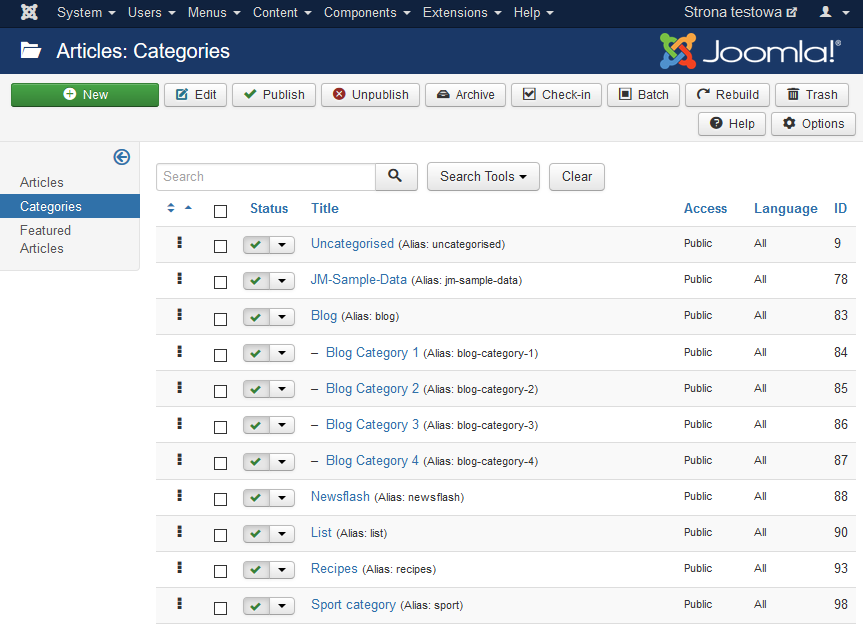
This is how a sample list of categories looks like:
Next step is to create an article.
How to create Joomla article?
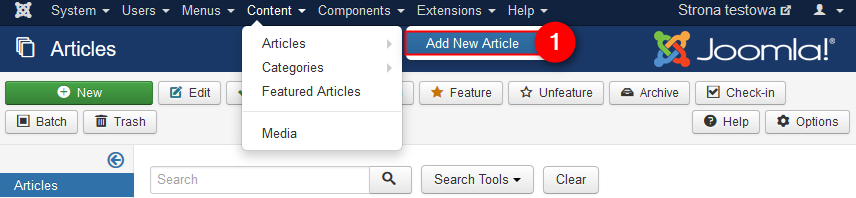
In the back-end of your site go to:
Content -> Articles -> Add New Article
On this page you will see a form of adding a new Joomla articles. Let's take a look on the available settings.
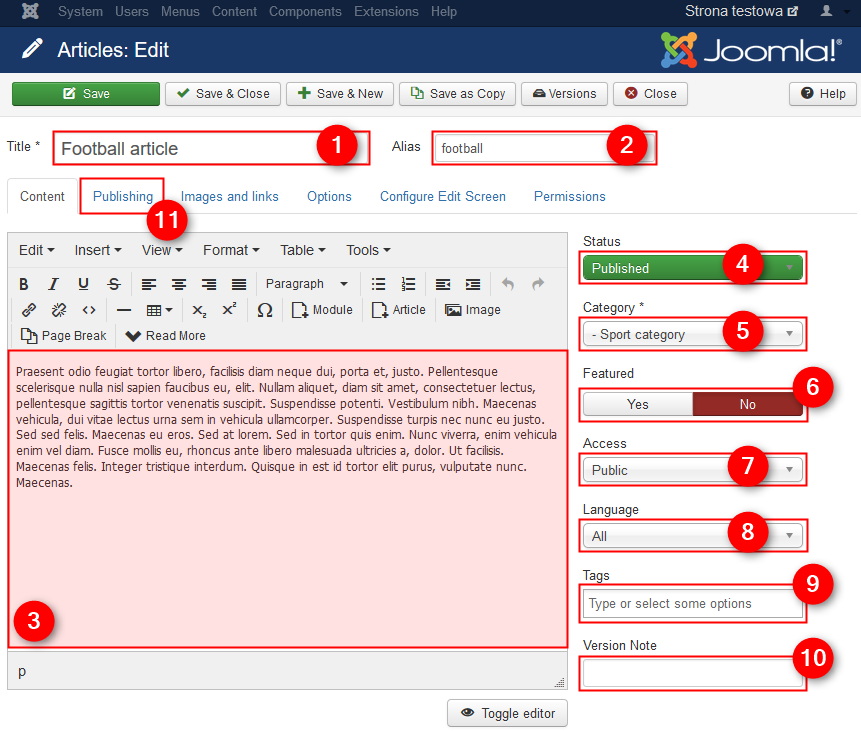
- Title - type a title of the article
- Alias - type an alias of the article
- Content - fill in content of article
- Status - leave "Published" to publish the article after save
- Category - choose a category of the article. You have created the category in the previous step.
- Featured - choose if you want the article to be featured. Featured articles you can display, for example, in a separate blog view.
- Access - restrict access to the article. This option is useful if you want a specific usergroup to see this article, otherwise leave "Public".
- Language - choose a language for the article. This opiton is useful if you create a multilingual site, otherwise leave "All".
- Tags - type tags for the article
- Version Note - it is an optional note for versioning of the article
- Go to the "Publishing" tab.
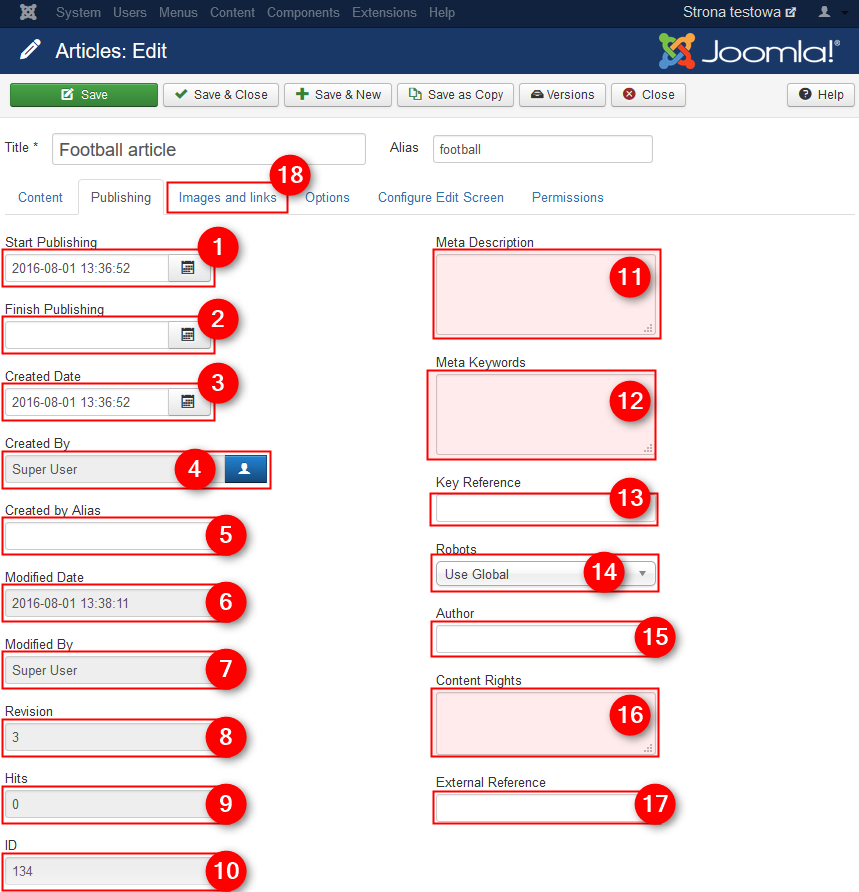
- Start Pulishing - choose a date when the article should be published
- Finish Publishing - choose a date when the article should be unpublished
- Created Date - creation date of the article. It will be generated after saving the article.
- Created By - author of the article. You can change the author if needed.
- Created By Alias - type an alias to user who created the article. It will be displayed instead of the author name.
- Modified Date - last modification date of the category. If someone will edit the article later, then the modified date will change.
- Modified By - user who modified the article last time
- Revision - number of times the article has been revised
- Hits - number of hits for the article
- ID - ID of the article. It will be generated after saving the article.
- Meta Description - type a meta description for SEO purpose
- Meta Keywords - type meta keywords for SEO purpose
- Key Reference - this field is used to store information referring to an external resource
- Robots - type the robots instructions
- Author - type the author of the content for SEO purpose
- Content Rights - describe what rights others have to use this content
- External Reference - it is an optional reference used to link to external data sources
- Go to the "Images and links" tab
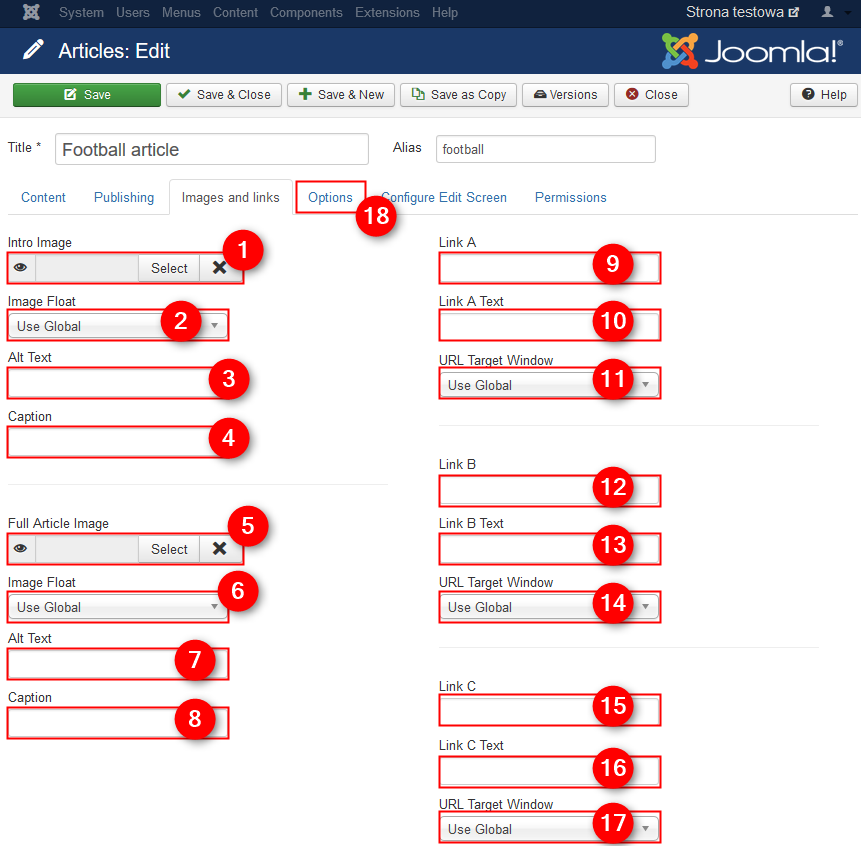
- Intro Image - choose intro image for this article. It will be used for intro text layouts such as blog and featured.
- Image Float - controls placement of the intro image
- Alt Text - alternative text used for visitors without access to the intro image
- Caption - caption is attached to the intro image
- Full Article Image - choose full article image. It will be used for single article display
- Image Float - controls placement of the full article image
- Alt Text - alternative text used for visitors without access to the full article image
- Caption - caption is attached to the full article image
- Link A - the actual link to which users will be redirected
- Link A Text - text to display for the link
- URL Target Window - target browser window when the menu item is selected
- Link B - the actual link to which users will be redirected
- Link B Text - text to display for the link
- URL Target Window - target browser window when the menu item is selected
- Link C - the actual link to which users will be redirected
- Link C Text - text to display for the link
- URL Target Window - target browser window when the menu item is selected
- Go to the "Options" tab.
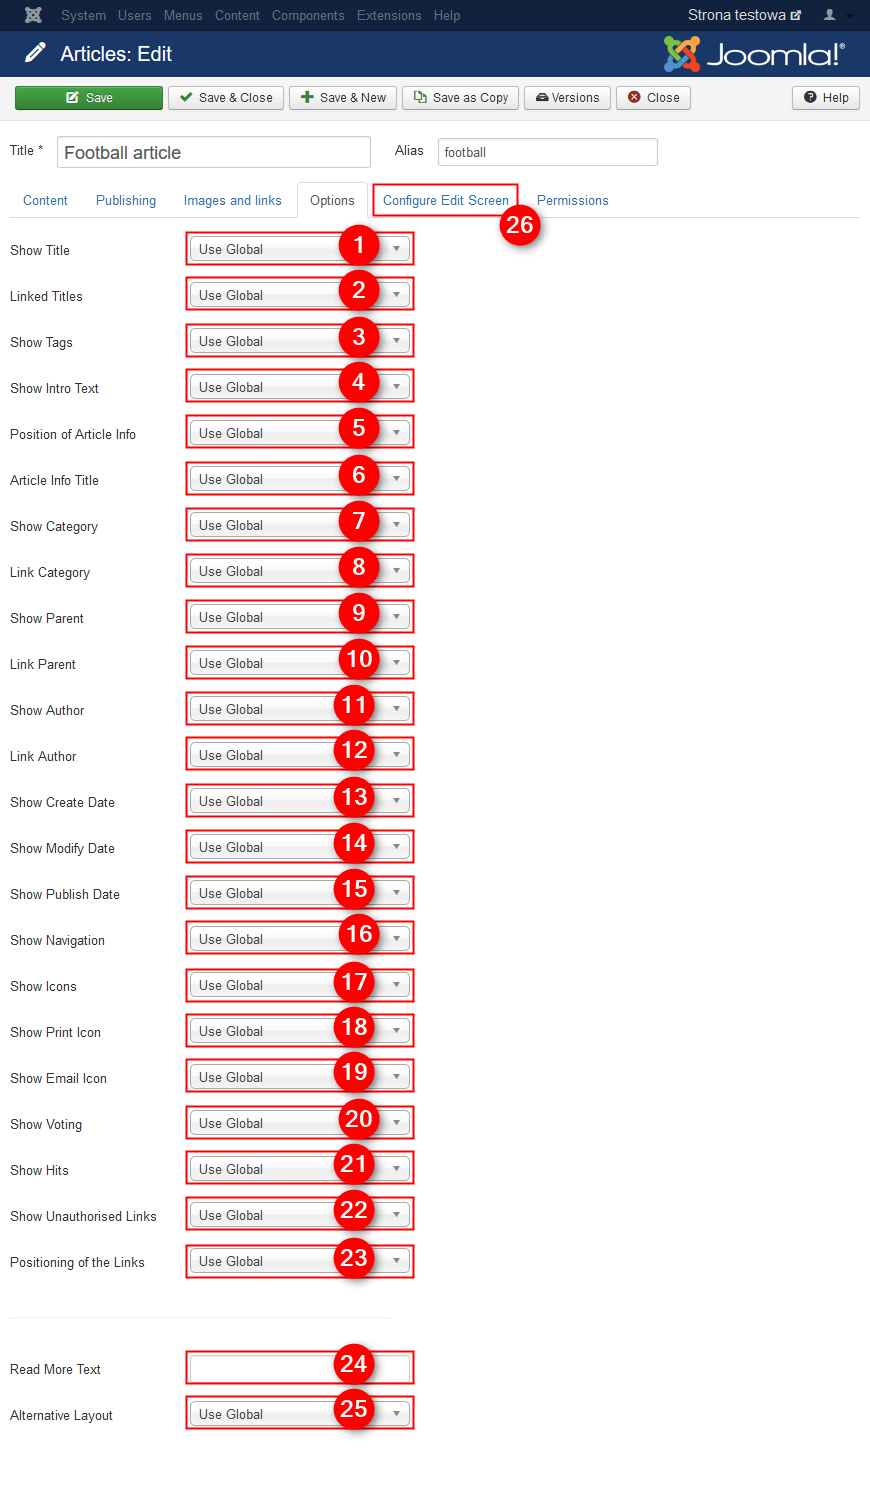
- Show title - select "Show" if you want to show title
- Linked Title - select "Yes" if you want to link title
- Show Tags - select "Show" if you wanto show tags
- Show Intro Text - select "Show" if you want to show intro text of the article when you drill down to the article. Otherwise visible will be only part of the article after read more.
- Position of Article Info - pull the article info block above or below the text or splits it into two separate blocks, one above and the other below
- Article Info Title - displays the article info title on top of the article information block
- Show Category - select "Show" if you want to display category
- Link Category - select "Yes" if you want to link category
- Show Parent- select "Show" to display parent category
- Link Parent - select "Yes" if you want to link to a layout showing articles in that category
- Show Author - select "Yes" if you want to show author
- Link Author - select "Yes" if you want to link to the author
- Show Create Date - select "Yes" if you want to show creation date
- Show Modify Date - select "Yes" if you want to show modify date
- Show Publish Date - select "Yes" if you want to show pubish date
- Show Navigation - select "Yes" if you want to show navigation
- Show Icons - select "Yes" if you want to show icons
- Show Print Icon - select "Yes" if you want to show print icon
- Show Email Icon - select "Yes" if you want to show email icon
- Show Voting - select "Yes" if you want to show voting
- Show Hits - select "Yes" if you want to show hits
- Show Unauthorised Links - select "Yes" if you want to show unauthorised link
- Positioning of the Links - display the links above or below the content
- Read More Text - type a custom text instead of "Read More"
- Alternative Layout - use a different layout from the component or template overrides
- Go to the "Configure Edit Screen" tab
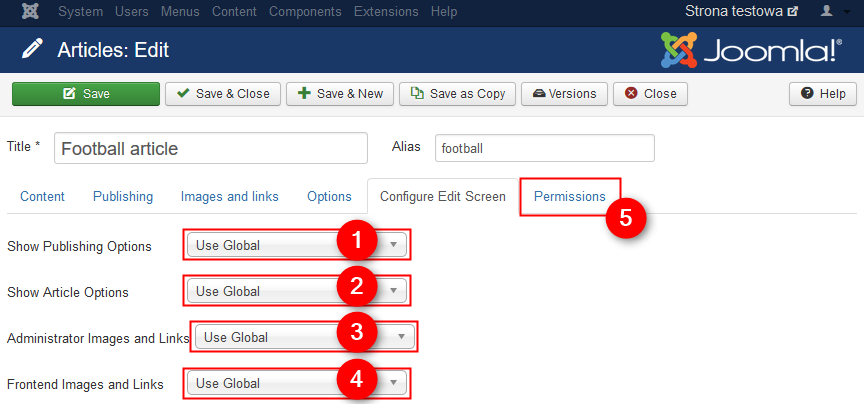
- Show Publishing Options - show or hide the publishing options
- Show Article Options - show or hide the article options
- Administrator Images and Links - show or hide fields to insert images and links in the administrator
- Frontend Images and Links - show or hide fields to insert images and links when frontend editing
- Go to the "Permissions" tab
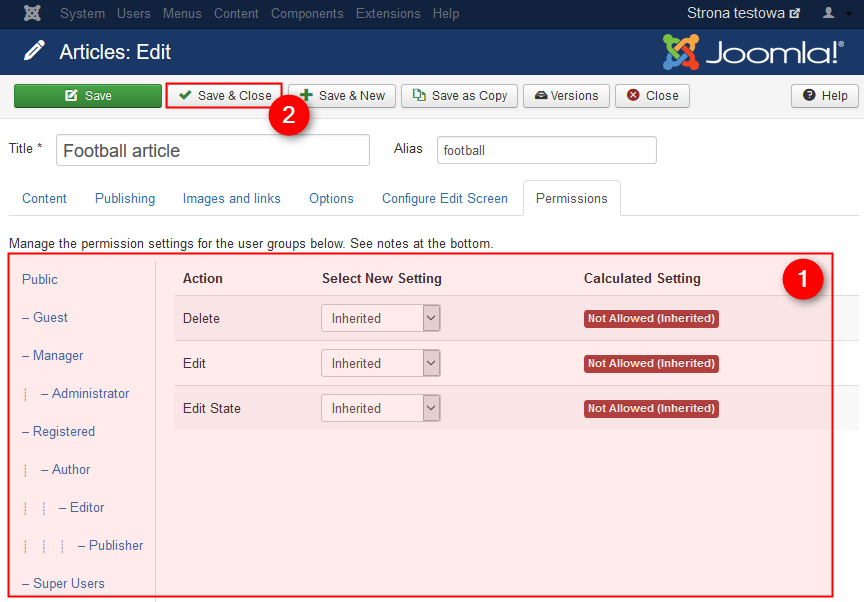
- Here you can specify permission levels for other users. Leave untouched if you want to use global permissions.
- Once you complete filling all article details click on "Save & Close"
How to display an article?
In the back-end of your site go to:
Menus -> [menu name] -> Add New Menu Item
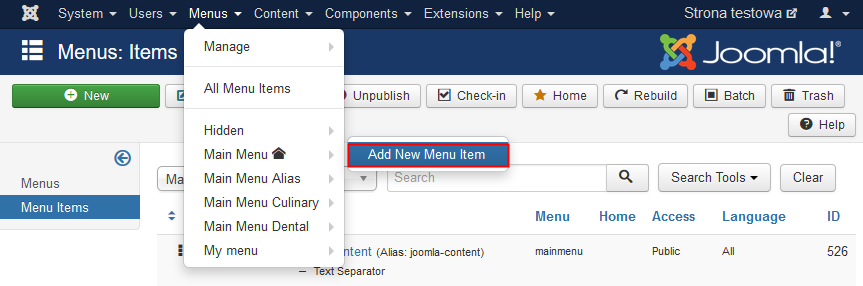
On this page you will see a form of adding a new menu item.
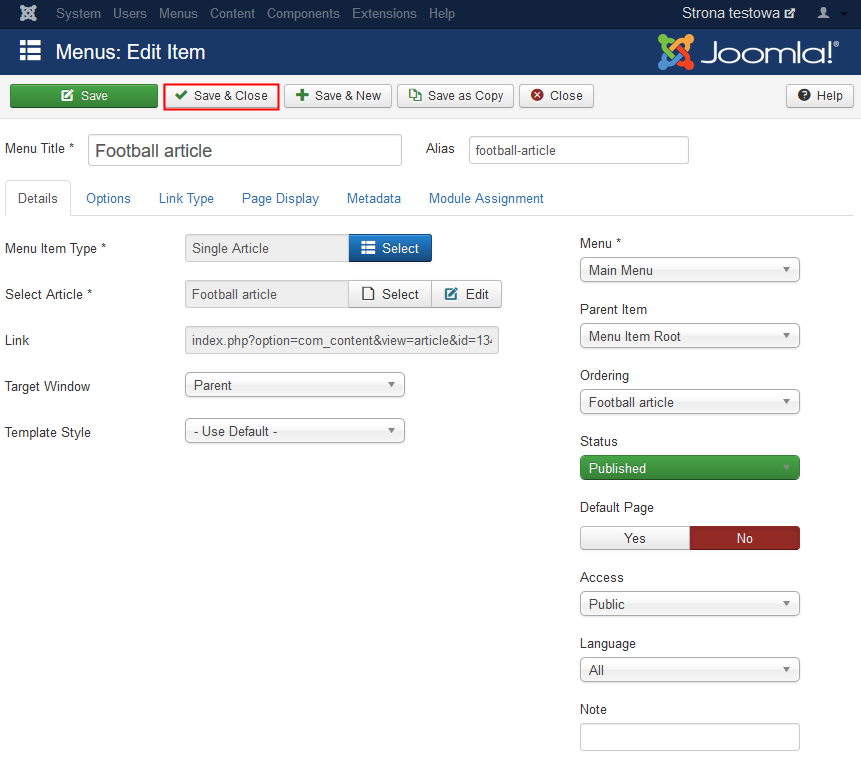
- Set fields as follows
- Click on "Save & Close"
Read more on how to create a menu and menu items
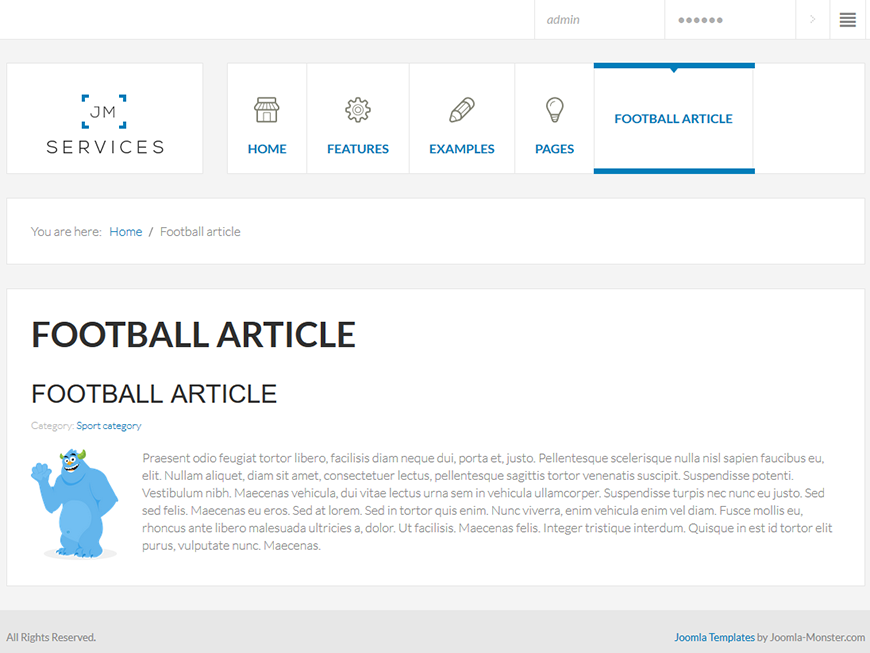
Now, go to the front-end of your site and you should see your new menu item. This is how it looks in our example: